자바스크립트 + 스프링 부트(Spring Boot): BASE64로 JSON을 통해 파일 업로드하기
자바스크립트 + 스프링 부트(Spring Boot): BASE64로 JSON을 통해 파일 업로드하기
BASE64란 8비트 바이너리 데이터(예를 들어 실행파일이나, ZIP파일 등)를 문자 코드에 영향을 받지 않는 공통 ASCII 영역의 문자들로만 이루어진 일련의 스트링으로 바꾸는 인코딩 방식을 가리키는 개념입니다. 다시 말해서, 바이너리를 읽을 수 있는 스트링 형태로 바꾼 자료형을 BASE64라고 합니다. (자세한 설명)
예전에 스프링 부트에서 MultipartFile을 이용해 파일 업로드를 하는 방법에 대한 글을 쓴 적이 있습니다.
이 방법의 장점도 많겠지만 JSON을 통해 리퀘스트를 전송하고자 할 때 JSON 안에 포함하여 사용할 수 없다는 단점이 있었습니다. 일반 바이너리 파일을 BASE64로 변환하면 약 33%의 사이즈 증가가 있다고 하지만, 이미지 파일같은 작은 사이즈의 파일들은 @RequestBody를 통해 JSON에 포함해서 전송하면 MultipartFile을 별도로 처리해야 하는 불필요한 과정을 생략할 수 있습니다.
스프링 부트 컨트롤러
클라이언트로부터 인코딩된 BASE64 텍스트를 받은 뒤, 그것을 바이트 배열로 디코딩하여 FileOutputStream을 통해 파일을 생성합니다.
1
2
3
4
5
6
import javax.swing.filechooser.FileSystemView;
import java.io.File;
import java.io.FileOutputStream;
import java.io.IOException;
import java.net.URLEncoder;
import java.util.Base64;
1
2
3
4
5
6
7
8
9
10
11
12
13
14
15
16
17
18
19
20
21
22
23
24
25
26
27
28
29
30
31
32
33
34
35
36
37
38
39
40
41
42
43
44
45
@PostMapping("/api/upload")
public Map<String, Object> addData(@RequestBody DataDTO data) {

    Map<String, Object> result = new HashMap<>();

    String fileBase64 = data.getFileBase64();

    // 파일이 업로드되지 않았거나 사이즈가 큰 경우를 체크합니다.
    // 사이즈는 일반 바이트에서 1.33을 곱하면 BASE64 사이즈가 대략 나옵니다.

    if(fileBase64 == null || fileBase64.equals("")) {
        result.put("isFileInserted", false);
        result.put("uploadStatus", "FileIsNull");
        return result;
    } else if(fileBase64.length() > 400000) {
        result.put("isFileInserted", false);
        result.put("uploadStatus", "FileIsTooBig");
        return result;
    }

    try {
        String fileName = data.getFileName(); // 파일네임은 서버에서 결정하거나 JSON에서 받아옵니다.

        // 저장할 파일 경로를 지정합니다.
        File file = new File(FileSystemView.getFileSystemView().getHomeDirectory()
                + "/app/resources/" + fileName);

        // BASE64를 일반 파일로 변환하고 저장합니다.
        Base64.Decoder decoder = Base64.getDecoder();
        byte[] decodedBytes = decoder.decode(fileBase64.getBytes());
        FileOutputStream fileOutputStream = new FileOutputStream(file);
        fileOutputStream.write(decodedBytes);
        fileOutputStream.close();

        result.put("isFileInserted", true);
        result.put("uploadStatus", "AllSuccess");

    } catch(IOException e) {
        System.err.println(e);
        result.put("uploadStatus", "FileIsNotUploaded");
        result.put("isTTSInserted", false);
    }

    return result;
}
참고로 DataDTO 구조는 다음과 같습니다.
1
2
3
4
5
6
7
public class DataDTO {

    private Long id;
    private String fileName;
    private String fileBase64;

    // ...... 이하 생략 (Getter/Setter 등) ......
자바스크립트
파일을 보내는 쪽에서 BASE64로 인코딩 한 다음 보내야 합니다.
1
2
3
4
5
6
7
8
9
10
11
12
13
14
15
16
17
18
19
20
21
22
23
24
25
26
27
28
29
30
31
32
33
34
let encodedFile, originalFileName

function handleFile(e) {
    const files = e.target.files

    if(files.length > 0) {
        const file = e.target.files[0]
        originalFileName = file.name

        if(file.size > 300000) {
            alert("파일 사이즈가 너무 큽니다.")
            return false
        }

        // FileReader를 사용해 BASE64로 변환합니다.
        const reader = new FileReader()

        // FileReader가 파일을 load했을 시 동작할 이벤트를 지정합니다.
        reader.addEventListener("load", () => {
            const dataIndex = reader.result.indexOf(',') + 1
            const base64 = reader.result.substring(
                            dataIndex,
                            reader.result.length
            )

            encodedFile = base64

        })

        // file을 DataURL 형식으로 읽습니다.
        reader.readAsDataURL(file)

    }
}
1
2
3
4
5
6
7
8
9
10
11
12
13
14
15
16
17
18
19
20
21
22
23
24
async function sendData() {

    if(!encodedFile) {
        alert("파일이 없습니다.")
        return false
    }

    const dataObj = {
        fileBase64: encodedFile,
        fileName: originalFileName
    }

    const initFetch = await fetch("/api/upload", {
        method: "POST",
        headers: {
            'Content-Type': 'application/json'
        },
        body: JSON.stringify(dataObj)
    })

    const data = await initFetch.json()
    // 결과 JSON 받은 후 동작

}
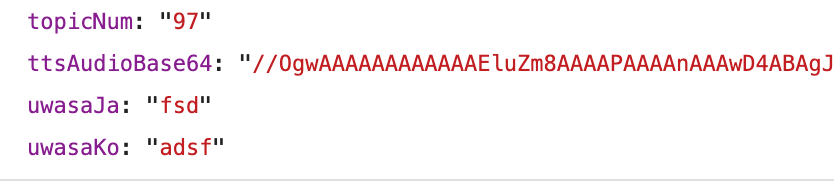
JSON 업로드 예제
Request JSON 일부
서버로부터 응답 결과

This post is licensed under
CC BY 4.0
by the author.