Spring Boot: “네이버 아이디로 로그인하기” 연동 – 스프링 시큐리티와 연결 (2)
전체 코드 보기
- 깃허브에서 전체 코드 보기 - https://github.com/ayaysir/spring-boot-security-example-1
소개
- 보다 개선된 네이버 아이디로 로그인 - 스프링 부트(Spring Boot): 구글 로그인 연동 (스프링 부트 스타터의 oauth2-client) 이용 + 네이버 아이디로 로그인
이전글의 두 상황을 결합하여 네이버 아이디로 로그인(이하 네아로)을 스프링 시큐리티와 연결하는 예제입니다.
가정
외부 소셜 로그인을 구현할 때 다음 상황이 있습니다.
- 기존에 사용자 계정이 존재하고, 네아로를 기존 로그인 체계로 연결
- 기존 사용자 계정과 연결하지 않고 네이버 아이디를 단독으로 사용
여기서는 1번을 다룹니다.
주의사항
네아로 연결 시 구현 내용 및 주의사항들이 있습니다.
- 네아로 연동이 안되어 있다면, 네아로 연동하는 창을 띄운다. – 이 때, 로그인이 되어 있다면 기존 아이디를 네아로와 연동할 것인지 확인 여부를 물음
- 네아로 연동 안되어 있고 로그인이 되어 있지 않다면, 로그인 창(+회원가입 링크)으로 리다이렉트 – 기존에 회원아이디로 로그인했다면 네아로 연동 과정을 계속 진행 – 회원가입이 되지 않은 상태이며 이 회원 가입링크를 통해 가입한 경우 가입 완료하자마자 네아로 연동 과정 진행
- 네아로 연동이 되어 있다면 연동 정보를 통해 로그인 처리 – 현재 로그인한 계정과 네아로 연결된 로그인 계정이 다른 경우, 현재 계정을 로그아웃하고 그 연결된 계정으로 재로그인
오늘은 1번을 구현하도록 하겠습니다. 3번은 지난 글에서 구현하였습니다.
방법
1. 데이터베이스 구조
외부 로그인 연동 테이블(users_oauth)
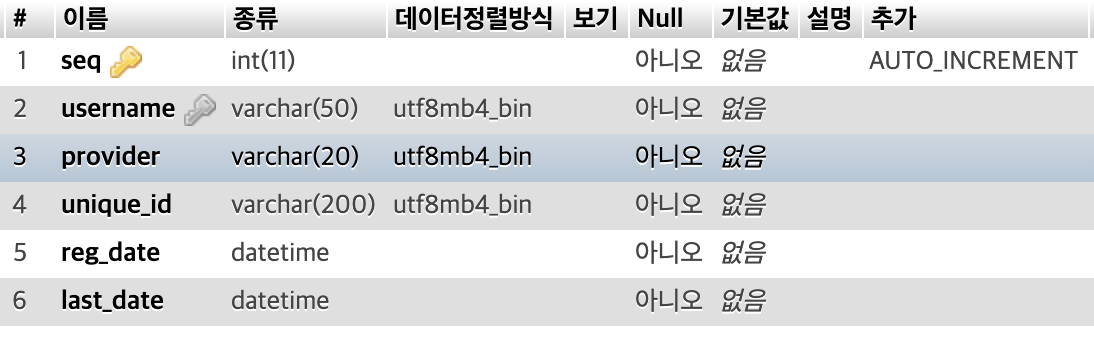
username은 외래키로 회원 테이블의 키와 연결됩니다. provider는 제공사 이름으로, “naver“, “google” 등이 입력됩니다. unique_id에는 회원을 구분하는 고유값이 입력됩니다.
2. 컨트롤러, DAO 등 작성
1
2
3
4
5
6
7
8
9
10
11
12
13
14
15
16
17
18
19
20
21
22
23
24
25
26
27
28
29
30
31
32
33
34
35
36
37
38
39
40
41
42
43
44
45
46
47
48
49
50
51
52
53
54
55
56
57
58
59
60
61
62
63
64
65
66
67
68
69
70
71
72
73
74
75
76
77
78
79
80
81
82
83
84
85
86
87
88
89
90
91
92
93
94
95
96
97
98
99
100
101
102
103
104
// 로그인 컨트롤러: 전체 내용은 지난번 글 참고

@Autowired SimpleUserDAO sud;

/**
 * 콜백 페이지 컨트롤러
 * @param session
 * @param request
 * @param model
 * @return
 * @throws IOException
 * @throws ParseException
 */
@SuppressWarnings("unchecked")
@RequestMapping("/naver/callback1")
public String naverCallback1(HttpSession session, HttpServletRequest request, Model model) throws IOException, ParseException {

  String code = request.getParameter("code");
  String state = request.getParameter("state");
  String redirectURI = URLEncoder.encode(REDIRECT_URI, "UTF-8");

  UrlBuilder ub = new UrlBuilder("https://nid.naver.com/oauth2.0/token");
  ub
    .add("grant_type", "authorization_code")
    .add("client_id", CLIENT_ID)
    .add("client_secret", CLI_SECRET)
    .add("redirect_uri", redirectURI)
    .add("code", code)
    .add("state", state);
  System.out.println(ub);

  String apiURL = ub.toString();

  String res = requestToServer(apiURL);

  if(res != null && !res.equals("")) {
    Map<String, Object> parsedJson = new JSONParser(res).parseObject();
    if(parsedJson.get("access_token") != null) {

      //
      String infoStr = getProfileFromNaver(parsedJson.get("access_token").toString());
      Map<String, Object> infoMap = new JSONParser(infoStr).parseObject();
      if(infoMap.get("message").equals("success")) {
        Map<String, Object> infoResp = (Map<String, Object>) infoMap.get("response");
        String uniqueId = infoResp.get("id").toString();
        System.out.println(uniqueId);
        List<Map<String, String>> infoOAuth = sud.getOAuthInfoByProviderAndUniqueId("naver", uniqueId);
        if(infoOAuth.size() == 1) {
          System.out.println(infoOAuth);
          // 네아로 연동이 되어 있다면 연동 정보를 통해 로그인 처리
          // - 현재 로그인한 계정과 네아로 연결된 로그인 계정이 다른 경우, 현재 계정을 로그아웃하고 그 연결된 계정으로 재로그인
          loginWithoutForm(infoOAuth.get(0).get("username"));
          model.addAttribute("isConnectedToNaver", true);
        } else {
          System.out.println("네이버 연동 정보 없음");
          // 로그인이 되어 있다면 기존 아이디를 네아로와 연동할 것인지 확인 여부를 물음
          model.addAttribute("isConnectedToNaver", false);
          model.addAttribute("uniqueIdOfNaver", uniqueId);
        }
      }

      session.setAttribute("currentNaverUser", res);
      session.setAttribute("currentAT", parsedJson.get("access_token"));
      session.setAttribute("currentRT", parsedJson.get("refresh_token"));

      model.addAttribute("res", res);
    } else {
      model.addAttribute("res", "Login failed!");
    }
    System.out.println(parsedJson);
  } else {
    model.addAttribute("res", "Login failed!");
  }
  return "test-naver-callback";
}

/**
 * 네이버 계정을 users_oauth 테이블에 할당
 * @param session
 * @param auth
 * @param model
 * @param uniqueId
 * @return
 */
@PostMapping("/oauth/assign/naver")
public String addRowToOAuthTableForNaver(HttpSession session, Authentication auth, Model model, String uniqueId) {
  String username = auth.getName();
  String provider = "naver";
  List<Map<String, String>> infoOAuth = sud.getOAuthInfoByProviderAndUniqueId(provider, uniqueId);
  int resultCode = 0;
  if(infoOAuth.size() == 0) {
    Map<String, String> aRow = new HashMap<>();
    aRow.put("username", username);
    aRow.put("provider", provider);
    aRow.put("unique_id", uniqueId);
    resultCode = sud.insertAnUserOAuth(aRow);
    if(resultCode <= 0) {
      session.setAttribute("currentNaverUser", null);
    }
    model.addAttribute("task", "assign-naver");
    model.addAttribute("resultCode", resultCode);
  }
  return "redirect:/";
}
연동이 되어있지 않은 상황이라면 isConnectedToNaver와 uniqueIdOfNaver 정보를 Model 속성에 담아 뷰 페이지로 넘깁니다. 밑의 뷰 페이지의 _test-naver-callback.html_에 연결되는 내용이 있습니다. addRowToOAuthTableForNaver 메소드에서는 이미 연동된 네이버 아이디인지 여부를 검색하고 연동이 안되어있으면 연동 정보 레코드를 추가하는 작업을 진행합니다. 사실 그 전에 이미 연동 여부를 naverCallback1 메소드에서 이미 체크한 상태이므로 여기서 다시 검사하지 않아도 상관은 없습니다.
1
2
3
4
5
6
7
8
9
10
11
12
13
14
15
16
17
18
19
SimpleUserDAO: 전체 내용은 지난 글 참고

/**
 *
 * @param aRow
 * @return
 */
public int insertAnUserOAuth(Map<String, String> aRow) {
  String sql = "insert into users_oauth"
      + "(seq, username, provider, unique_id, reg_date, last_date) "
      + "values(0, ?, ?, ?, sysdate(), sysdate())";

  return jt.update(sql,
      aRow.get("username"),
      aRow.get("provider"),
      aRow.get("unique_id")
    );

}
users_oauth 테이블에 연동 정보를 추가하는 부분입니다.
1
2
3
4
5
6
7
8
9
10
11
12
13
14
15
16
17
18
19
20
21
22
23
24
25
26
27
// 메인 컨트롤러의 일부

@Autowired SimpleUserDAO sud;

@RequestMapping("/")
public String home(Model model, HttpSession session) throws Exception {

  Object currentAuth = SecurityContextHolder.getContext().getAuthentication().getPrincipal();
  UserDetails principal = null;

  if(!(currentAuth instanceof String)) {
    principal = (UserDetails) currentAuth;
    List<Map<String, ?>> userInfo = sud.getUserInfo(principal.getUsername());
    String food = (String) userInfo.get(0).get("food");
    model.addAttribute("food", food);
    LoginController lc = new LoginController();

    // 메인 화면에 네이버 연동 버튼 추가
    List<Map<String, String>> infoOAuth = sud.getOAuthInfoByProviderAndUsername("naver", principal.getUsername());
    if(infoOAuth.size() == 0) {
      String apiURL = lc.getNaverOAuthURI(session);
      model.addAttribute("naverApiURL", apiURL);
    }
  }

  return "home";
}
연동이 안되어 있다면 메인화면에 연동하기 버튼을 추가합니다. 이미 연동된 상태라면 해당 부분은 나타나지 않습니다.
3. 뷰 페이지(Thymeleaf) 작성
home.html (메인 페이지)
1
2
3
4
5
6
7
8
9
10
11
12
13
14
15
......
<body>
  ......


  <div class="row" th:if="${naverApiURL ne null}">
    <div class="col-12">
      <h3>현재 계정을 네이버와 연동하시겠습니까? 이 부분은 연동이 되지 않았을 때에만 나타납니다.</h3>
          <a th:href="${naverApiURL}"><img height="50" src="http://static.nid.naver.com/oauth/small_g_in.PNG" /></a>
    </div>
  </div>

  ......

</body>
test-naver-callback.html (네이버 콜백 페이지)
1
2
3
4
5
6
7
8
9
10
11
12
13
14
15
16
17
18
19
20
......

<body>
  ......

  <th:block sec:authorize="isAuthenticated()">
    <p th:text="${isConnectedToNaver}"></p>
    <div th:unless="${isConnectedToNaver}">
      <h5>현재 아이디를 네이버 아이디와 연동하시겠습니까?</h5>
      <a>[NO]</a>
      <form th:action="@{/oauth/assign/naver}" method="POST">
        <input type="hidden" th:value="${uniqueIdOfNaver}" name="uniqueId">
        <button>[YES]</button>
      </form>
    </div>
    <div th:if="${isConnectedToNaver}">
      <h5>현재 아이디 연동이 되어 있습니다.</h5>
    </div>
  </th:block>
</body>
4. 테스트
 처음에는 테이블이 비어있습니다. (연동 전)
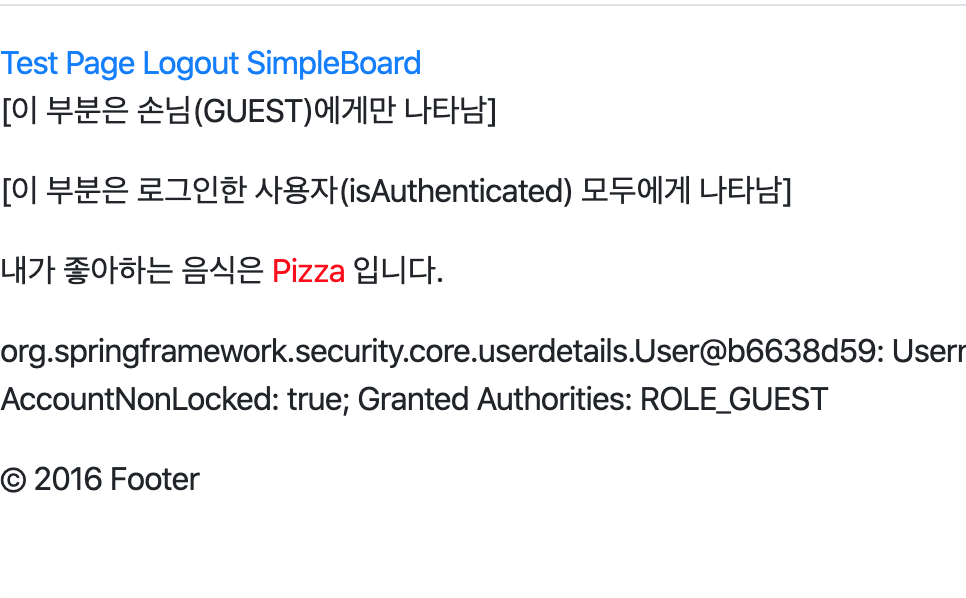
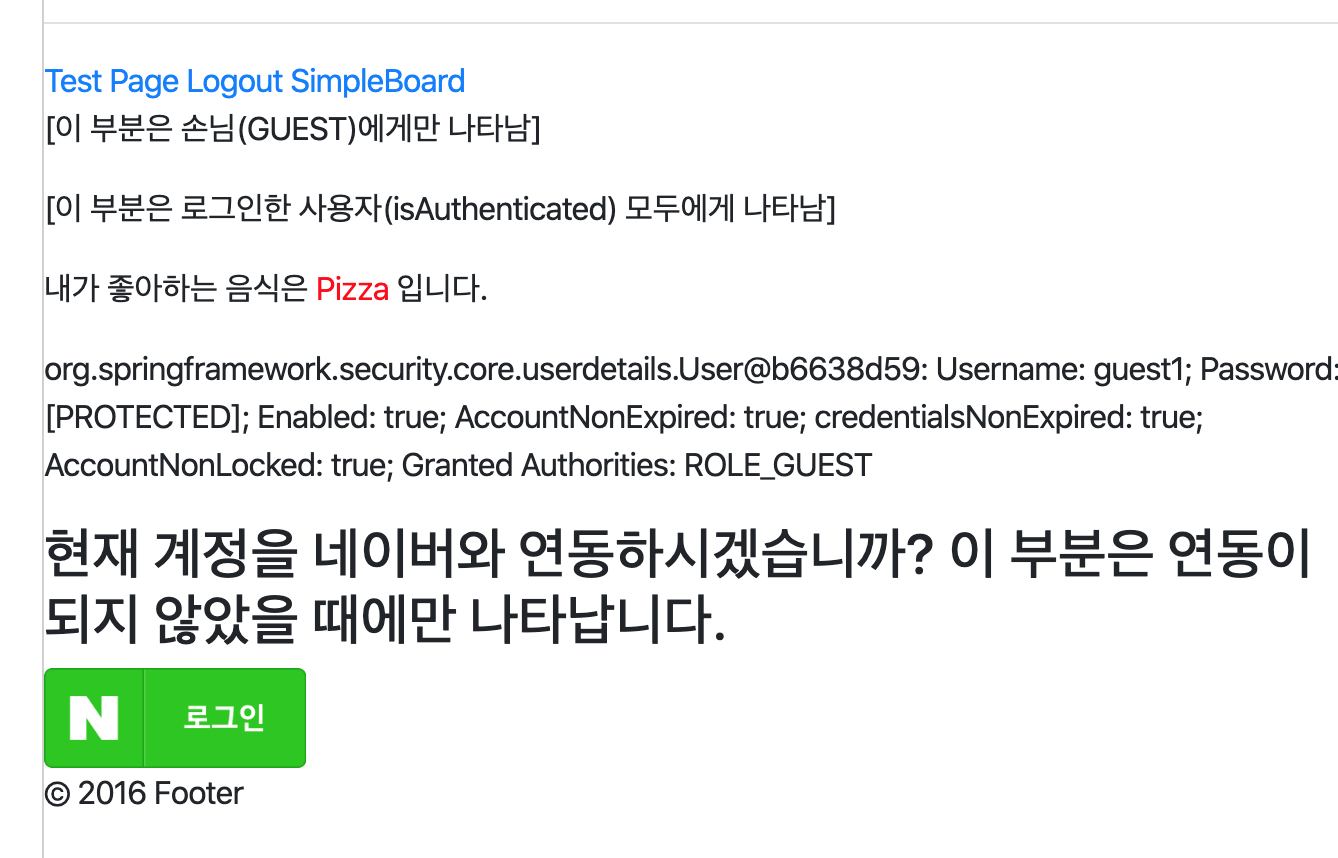 guest1 아이디로 로그인하면 네이버 연동 여부를 묻는 부분이 나타납니다.
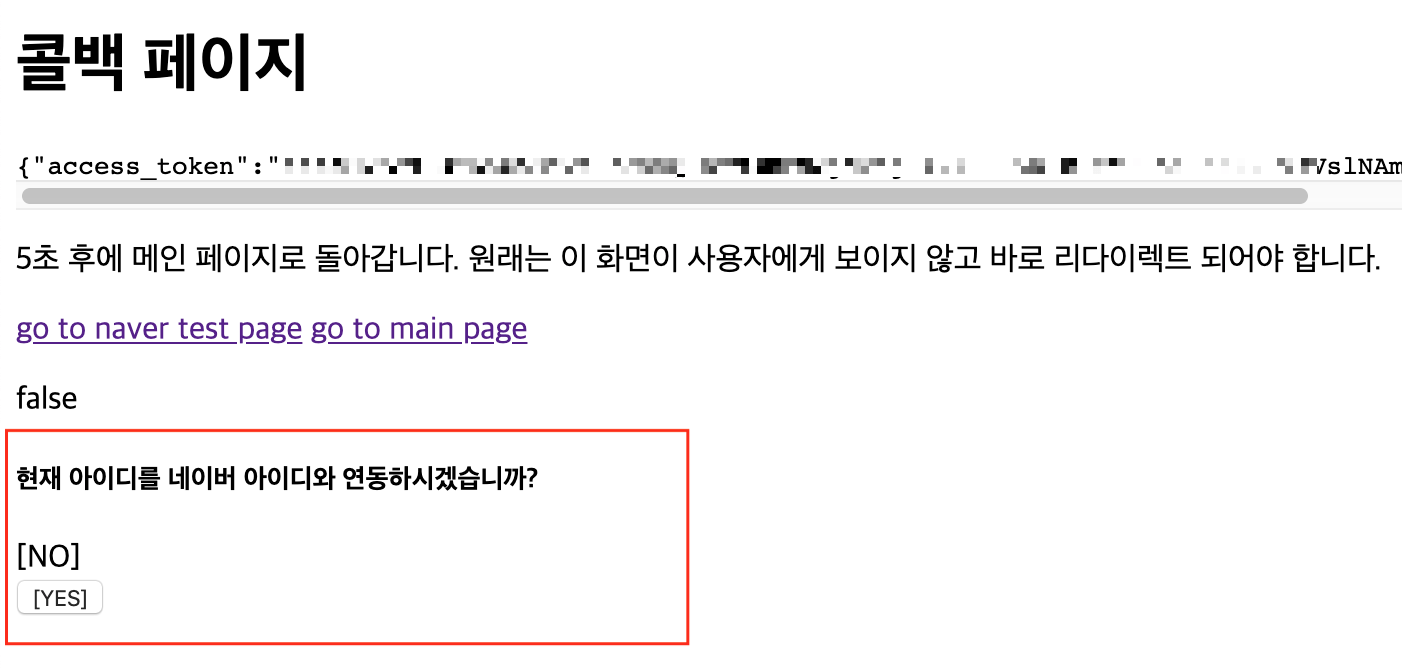 빨간 네모박스로 연동 여부를 물어봅니다.
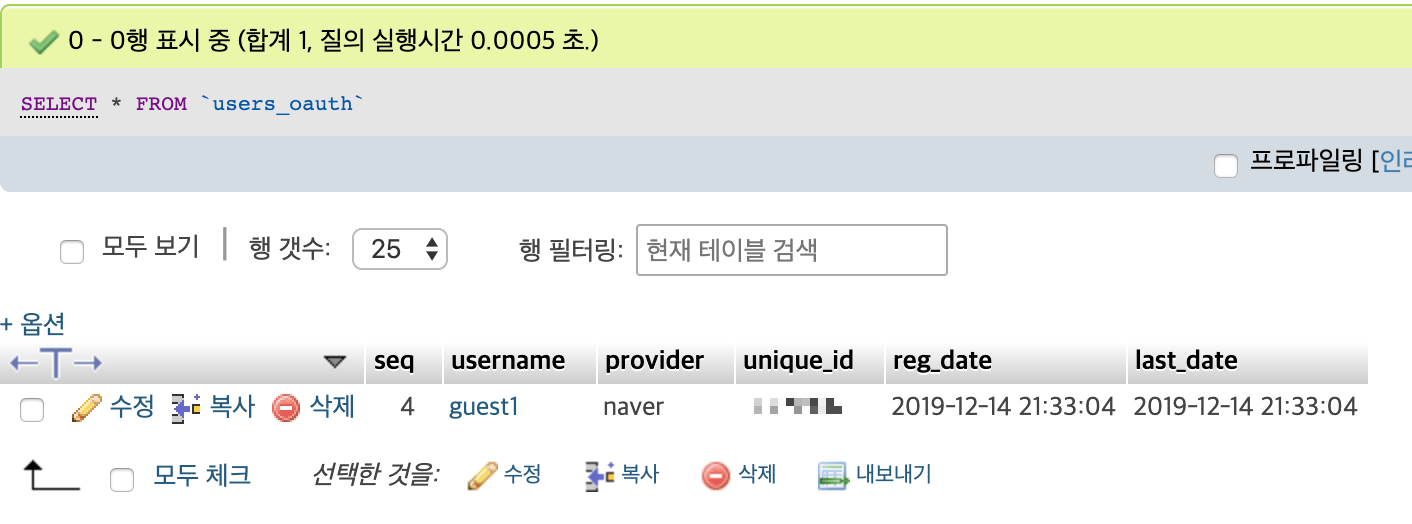 [YES] 버튼을 누르면 연동 작업이 진행됩니다. 테이블에 연동 정보가 추가되었습니다.
 네이버 계정과 연동되었으므로 아까 그 부분은 더 이상 나오지 않습니다.
_guest1_로 로그인하는 장면입니다.
