Swift(스위프트): URL 관련 기능 요약 (URL, URLComponents, URLSession)
Swift(스위프트): URL 관련 기능 요약 (URL, URLComponents, URLSession)
URL 타입
인코딩되지 않은 주소를 URL의 형태로 관리합니다.
1
2
let urlString = "https://itunes.apple.com/search?media=music&entity=musicVideo&term=collier"
let url = URL(string: urlString)
URL의 string:은 영문, 숫자와 특정 문자만 인식 가능하며, 한글, 띄어쓰기 등은 인식하지 못합니다.
아래 메소드를 통해 URL로부터 몇몇 정보를 가져올 수 있습니다.
1
2
3
4
5
url?.absoluteString // 절대주소 (urlString과 동일)
url?.scheme // http? htttps?
url?.host // "itunes.apple.com"
url?.path // "/search"
url?.query // "media=music&entity=musicVideo&term=collier"
URL - relativeTo:
상대 주소를 추가할 때 사용합니다.
1
2
3
4
5
let baseURL = URL(string: "https://itunes.apple.com")
let relativeURL = URL(string: "search", relativeTo: baseURL)
relativeURL?.absoluteString // "https://itunes.apple.com/search"
relativeURL?.baseURL // https://itunes.apple.com (URL? 타입)
relativeURL?.path // "/search"
URLComponents 타입
URL에 포함되어 있는 한글, 띄어쓰기 등을 자동으로 인코딩하여 관리합니다. 쿼리 파라미터 등은 URLQueryItem 타입의 변수를 하여 별도로 관리합니다.
1
2
3
4
5
6
7
8
9
// URLComponents - 한글, 띄어쓰기 등 가능
var urlComponents = URLComponents(string: "https://itunes.apple.com/search?")!
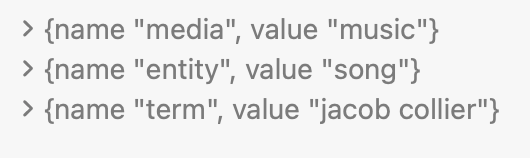
let mediaQuery = URLQueryItem(name: "media", value: "music")
let entityQuery = URLQueryItem(name: "entity", value: "song")
let termQuery = URLQueryItem(name: "term", value: "jacob collier")
urlComponents.queryItems?.append(mediaQuery)
urlComponents.queryItems?.append(entityQuery)
urlComponents.queryItems?.append(termQuery)
1
2
3
4
urlComponents.url?.scheme // "https"
urlComponents.string
// "https://itunes.apple.com/search?media=music&entity=song&term=jacob%20collier"
urlComponents.queryItems // 밑에
Codable
Codable이란Decodable과Encodable이 합쳐진 것으로 Swift 4 버전부터 이용 가능한 프로토콜입니다.- 구조체(structure)에 이것을 추가하면 외부 표현(대표적으로 JSON)으로 인코딩 또는 디코딩이 가능하게 됩니다.
Codable을 구현한struct를 만들 때 구조체 내부의 변수 이름과 JSON의 변수 이름과 동일하게 맞추는 것이 중요합니다.- 만약 불가피하게 다르게 해야 할 경우
CodingKey라는enum을 생성하여 서로의 변수 이름을 매핑합니다.
아래는 네트워크 상에 있는 원본 JSON입니다. 이것을 프로젝트에 가져와 사용하고 싶습니다.
1
2
3
4
5
6
7
8
9
10
11
12
13
14
15
16
17
18
19
20
21
22
23
24
25
26
27
28
29
30
31
32
33
34
35
36
37
38
{
  "resultCount": 50,
  "results": [
    {
      "wrapperType": "track",
      "kind": "song",
      "artistId": 28223958,
      "collectionId": 295286350,
      "trackId": 295286499,
      "artistName": "Collier",
      "collectionName": "Collier - Ep",
      "trackName": "No Matter What",
      "collectionCensoredName": "Collier - Ep",
      "trackCensoredName": "No Matter What",
      "artistViewUrl": "https://music.apple.com/us/artist/collier/28223958?uo=4",
      "collectionViewUrl": "https://music.apple.com/us/album/no-matter-what/295286350?i=295286499&uo=4",
      "trackViewUrl": "https://music.apple.com/us/album/no-matter-what/295286350?i=295286499&uo=4",
      "previewUrl": "https://audio-ssl.itunes.apple.com/itunes-assets/Music/85/73/31/mzm.alxzrkgx.aac.p.m4a",
      "artworkUrl30": "https://is2-ssl.mzstatic.com/image/thumb/Music/v4/1b/78/78/1b7878d3-7718-66b3-643b-600c4098c944/source/30x30bb.jpg",
      "artworkUrl60": "https://is2-ssl.mzstatic.com/image/thumb/Music/v4/1b/78/78/1b7878d3-7718-66b3-643b-600c4098c944/source/60x60bb.jpg",
      "artworkUrl100": "https://is2-ssl.mzstatic.com/image/thumb/Music/v4/1b/78/78/1b7878d3-7718-66b3-643b-600c4098c944/source/100x100bb.jpg",
      "collectionPrice": 5.94,
      "trackPrice": 0.99,
      "releaseDate": "2008-11-05T08:55:31Z",
      "collectionExplicitness": "notExplicit",
      "trackExplicitness": "notExplicit",
      "discCount": 1,
      "discNumber": 1,
      "trackCount": 6,
      "trackNumber": 5,
      "trackTimeMillis": 304520,
      "country": "USA",
      "currency": "USD",
      "primaryGenreName": "Pop",
      "isStreamable": true
    },
  ]
}
이 JSON을 Swift에서 다루고 싶다고 할 때 아래와 같이 struct를 만들어 사용할 수 있습니다.
1
2
3
4
5
6
7
8
9
struct Response: Codable {
    let resultCount: Int
    let tracks: [Track]

    enum CodingKeys: String, CodingKey {
        case resultCount
        case tracks = "results"
    }
}
1
2
3
4
5
6
7
8
9
10
11
12
struct Track: Codable {
    let title: String   // trackName
    let artistName: String  // artistName
    let thumbnailPath: String   // artworkUrl100

    // 실제 JSON 키와 매핑 (똑같다면 놔두고, 다르다면 오른쪽에 JSON 키이름 입력
    enum CodingKeys: String, CodingKey {
        case title = "trackName"
        case artistName
        case thumbnailPath = "artworkUrl100"
    }
}
URLSession
HTTP의 데이터자료를 가져올 때 사용합니다. URLSession은 생성 전에 configuraion이 필요합니다. 이에 대한 정보는 URLSessionConfiguration 클래스 내에 있습니다. default 와 ephemeral(덧없는) 이 있는데 둘의 차이점이라면 ephemeral 설정은 로컬 스토어에 캐싱 또는 쿠키 저장 등의 작업을 하지 않습니다.
1
2
3
4
5
let requestURL = urlComponents.url!

// URLSession - configuration 먼저 필요
let config = URLSessionConfiguration.default
let session = URLSession(configuration: config)
URLSession - dataTask
인터넷으로부터 데이터를 받아올 때 리퀘스트 URL과 받아온 이후 할 작업을 설정합니다.
1
session.dataTask(with: URLRequest, completionHandler: (Data?, URLResponse?, Error?) -> Void)
with- 데이터를 가져올 URL 인스턴스를 입력합니다.completionHandler- 데이터를 가져온 후 실행할 작업을 클로저 함수 형태로 입력합니다.Data는 데이터 바디입니다.URLResponse는 헤더 정보 등 리퀘스트와 관련된 정보입니다.Error는 가져오기 실패했을 경우 에러 정보를 가져옵니다.
위의 Codable 예제와 결합한 예제 코드입니다.
1
2
3
4
5
6
7
8
9
10
11
12
13
14
15
16
17
18
19
20
21
22
23
24
25
26
27
28
29
30
31
let dataTask = session.dataTask(with: requestURL) { (data, response, error) in
guard error == nil else { return }
guard let statusCode = (response as? HTTPURLResponse)?.statusCode else { return }
let successRange = 200..<300
guard successRange.contains(statusCode) else { return }
guard let resultData = data else { return }
// 트랙 목록을 가져오기 -> 트랙 오브젝트, struct로 파싱 (Codable)
// - JSON 파일, 데이터 -> 오브젝트
// - Response, Track struct 생성
// - struct 프로퍼티 이름과 실제 데이터의 키 맞추기 (CodingKey)
// - 파싱(decoding)
do {
let decoder = JSONDecoder()
let response = try decoder.decode(Response.self, from: resultData)
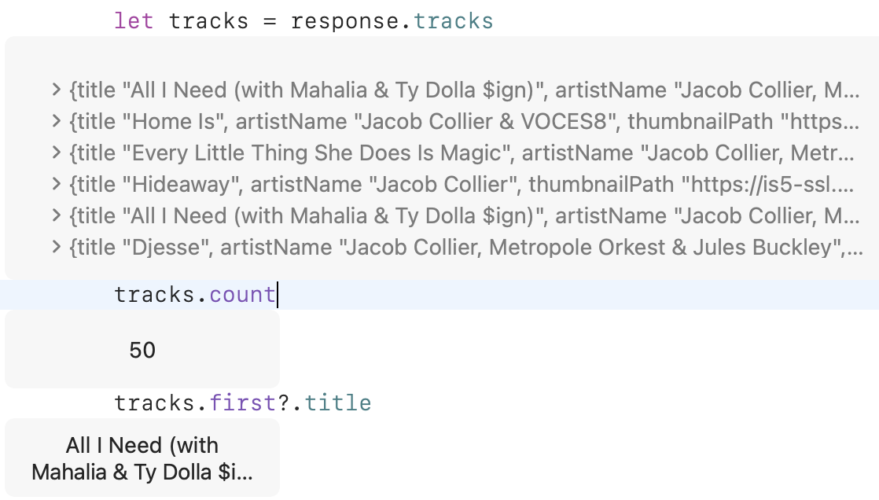
let tracks = response.tracks
tracks.count
tracks.first?.title
print(tracks.first?.thumbnailPath ?? "error")
} catch {
print("error: " + error.localizedDescription)
}
}
dataTask.resume()
dataTask를 정의한 후,dataTask.resume()으로 실제 데이터 가져오기 작업을 실행합니다.guard error == nil else { return }-error가nil이 아니면 계속 진행하고, nil이라면 return(중지) 합니다.guard let statusCode = (response as? HTTPURLResponse)?.statusCode else { return }- http status 코드를 가져옵니다. 만약nil이면return합니다.let successRange = 200..<300- http 스테이터스 코드에서 성공의 범위인 200번대 코드를 지정합니다.guard let resultData = data else { return }- 데이터가nil인 경우 리턴do ~ catch문 -try가 필요한 작업이 있는 경우 예외 처리 구문을 사용합니다.try decoder.decode(Response.self, from: resultData) - resultData로부터 받아온 자료를 Response 타입으로 디코딩합니다.
This post is licensed under
CC BY 4.0
by the author.