Swift: Action Extension으로 사진을 내 앱으로 전송하기
Swift: Action Extension으로 사진을 내 앱으로 전송하기
“Action Extension으로 사진을 내 앱에 넘기는 방법”은 Share Extension과 비슷하지만, Action Extension은 ‘공유’가 아니라 원본 앱의 컨텍스트 안에서 바로 실행되는 확장(App Extension) 입니다. 즉, 사용자가 사진 앱, 파일 앱 등에서 “공유” 메뉴 대신 “작업(Action)” 메뉴에서 내 앱을 실행할 수 있게 해줍니다.
아래는 사진 앱에서 이미지를 선택 → 내 앱의 Action Extension 실행 → 원본 앱으로 이미지 전달하는 전체 흐름과 코드 예시입니다.
요약
- Action Extension Target 생성
- Info.plist에 이미지 수신 설정
- ActionViewController에서 이미지 수신 후 App Group에 저장
- App Group 설정 (앱 간 공유)
- 메인 앱에서 이미지 파일 읽기
방법
(1) Action Extension Target 생성
- Xcode → File → New → Target…
- iOS → Application Extension → Action Extension 선택
- 이름 예: ImageTranslatorActionExtension
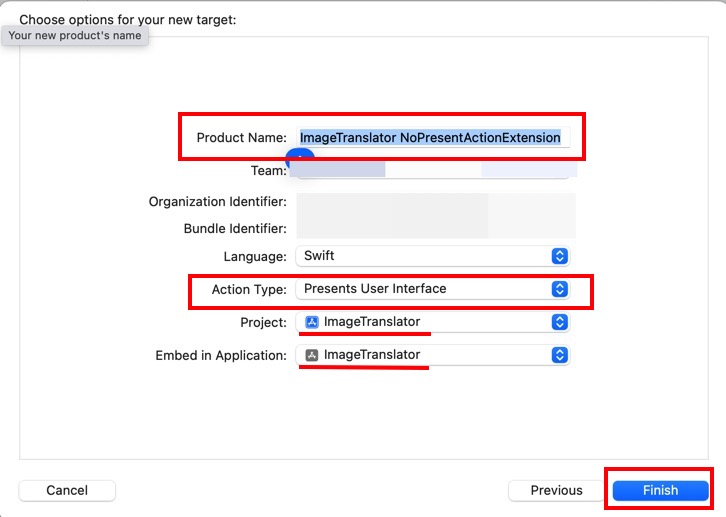
ActionType
- Present UI: 액션 확장에서 시트 등 보이는 UI를 표시합니다. 이번 포스트에서는 Present UI 의 경우만 다룹니다.
- No Present UI: UI를 표시하지 않습니다.
- “Activate …” 선택
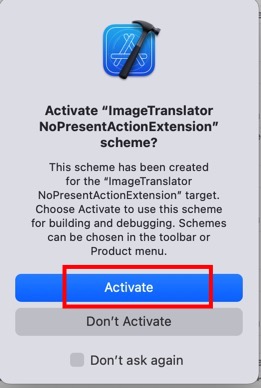
- 완료 후, ActionViewController.swift 파일이 자동 생성됩니다.
(2) Info.plist 설정 (Action Extension 프로젝트에)
Action Extension이 어떤 타입의 콘텐츠를 받을지 지정해야 합니다.
Info.plist의 NSExtension 항목을 다음과 같이 수정하세요:
1
2
3
4
5
6
7
8
9
10
11
12
13
14
15
16
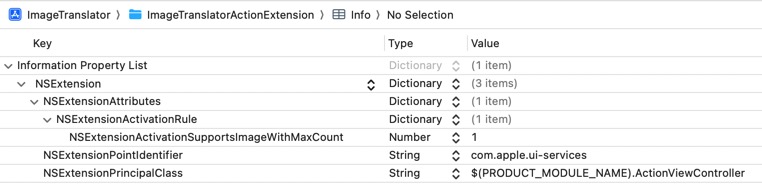
<key>NSExtension</key>
<dict>
<key>NSExtensionAttributes</key>
<dict>
<!-- 이미지를 받을 수 있도록 설정 -->
<key>NSExtensionActivationRule</key>
<dict>
<key>NSExtensionActivationSupportsImageWithMaxCount</key>
<integer>1</integer>
</dict>
</dict>
<key>NSExtensionPointIdentifier</key>
<string>com.apple.ui-services</string>
<key>NSExtensionPrincipalClass</key>
<string>$(PRODUCT_MODULE_NAME).ActionViewController</string>
</dict>
Property View에서 보면 다음과 같이 보입니다.
(3) ActionViewController.swift 구현 (Action Extension 프로젝트에)
이제 사진(이미지 데이터)을 가져오고, 내 앱으로 전달하는 코드를 작성합니다.
1
2
3
4
5
6
7
8
9
10
11
12
13
14
15
16
17
18
19
20
21
22
23
24
25
26
27
28
29
30
31
32
33
34
35
36
37
38
39
40
41
42
43
44
45
46
47
48
49
50
51
52
53
54
55
56
import UIKit
import UniformTypeIdentifiers

class ActionViewController: UIViewController {

  override func viewDidLoad() {
    super.viewDidLoad()
    handleInputImage()
  }

  private func handleInputImage() {
    // 확장에서 받은 데이터 가져오기
    guard let extensionItem = extensionContext?.inputItems.first as? NSExtensionItem else { return }
    guard let attachments = extensionItem.attachments else { return }

    for provider in attachments {
      // iOS 14 이상은 UTType.image
      if provider.hasItemConformingToTypeIdentifier(UTType.image.identifier) {
        provider.loadItem(forTypeIdentifier: UTType.image.identifier, options: nil) { item, error in
          if let error {
            print("이미지 로드 오류:", error)
            return
          }

          var image: UIImage?

          if let url = item as? URL {
            if let data = try? Data(contentsOf: url) {
              image = UIImage(data: data)
            }
          } else if let uiImage = item as? UIImage {
            image = uiImage
          }

          if let image {
            self.saveImageToAppGroup(image)
          }
        }
      }
    }
  }

  private func saveImageToAppGroup(_ image: UIImage) {
    guard let data = image.pngData() else { return }

    // App Group 경로 (메인 앱과 공유)
    if let containerURL = FileManager.default.containerURL(forSecurityApplicationGroupIdentifier: "group.com.yourcompany.imagetranslator") {
      let fileURL = containerURL.appendingPathComponent("action_shared_image.png")
      try? data.write(to: fileURL)
      print("공유 이미지 저장 완료: \(fileURL)")
    }

    // 완료 후 원래 앱으로 돌아감
    extensionContext?.completeRequest(returningItems: nil)
  }
}
- 완료 후
URLScheme를 이용하여 내가 만든 앱으로 이동하게 하는 방법은 이 포스트를 참조합니다.
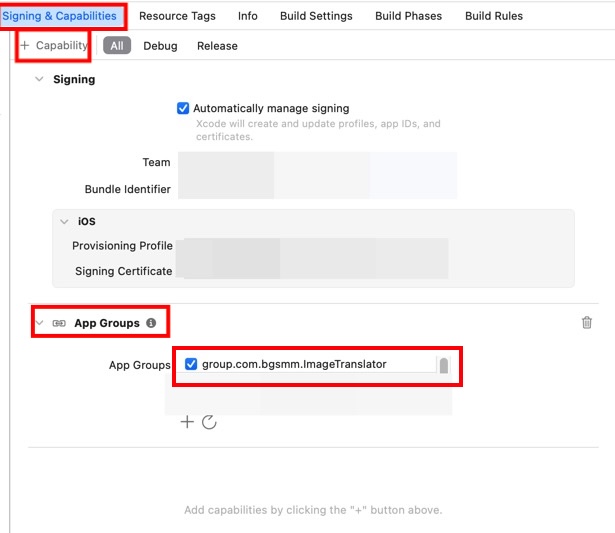
(4) App Group 설정
- 메인 앱과 Action Extension 두 타깃 모두
Signing & Capabilities → + Capability → App Groups추가 - 동일한 그룹 ID 생성:
group.com.yourcompany.imagetranslator - 위 코드에서 동일한 ID 사용.
(5) 메인 앱에서 이미지 불러오기
Action Extension에서 저장한 이미지는 메인 앱에서도 같은 App Group 경로를 통해 접근할 수 있습니다.
1
2
3
4
5
6
7
8
9
10
11
func loadSharedImageFromAction() -> UIImage? {
  // 파일 매니저를 통해 앱 그룹의 contiainerURL 받아옴
  if let containerURL = FileManager.default.containerURL(forSecurityApplicationGroupIdentifier: "group.com.yourcompany.imagetranslator") {
    let fileURL = containerURL.appendingPathComponent("action_shared_image.png")
    if let data = try? Data(contentsOf: fileURL),
       let image = UIImage(data: data) {
      return image
    }
  }
  return nil
}
앱이 실행될 때 이 함수를 호출하면, Action Extension에서 전달된 이미지를 바로 가져올 수 있습니다.
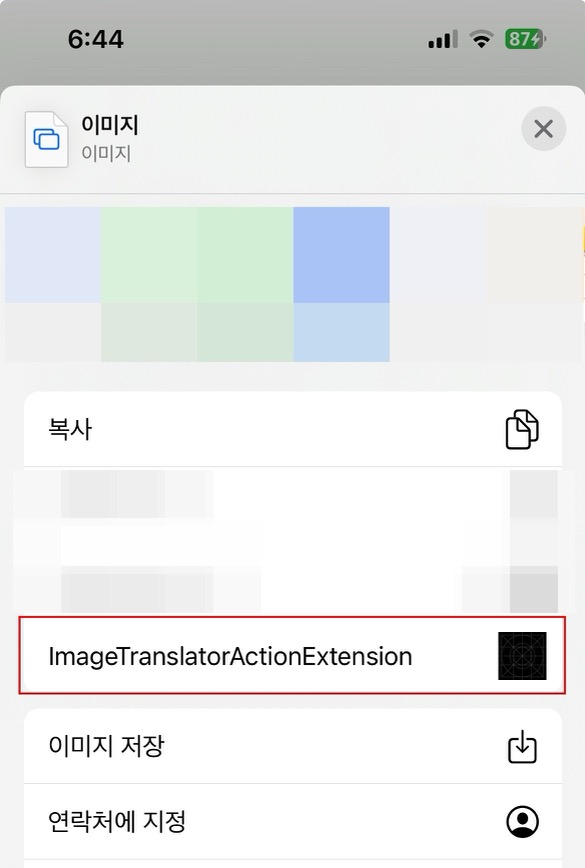
6) 빌드 후 아무 앱에서 이미지 공유 메뉴를 열고 Action Extension이 추가되었는지 확인
Share Extension과 동작 방식 비교
| 확장 종류 | 메뉴 위치 | 동작 방식 | 사용 예 |
|---|---|---|---|
| Share Extension | “공유하기” 시트 | 내 앱으로 콘텐츠 전달 | SNS 공유, 파일 전송 |
| Action Extension | “작업” 메뉴 | 원본 앱 내에서 실행 | 이미지 분석, OCR, 번역 |
This post is licensed under
CC BY 4.0
by the author.