SwiftUI: @State와 @Binding의 의미 / 뷰 간의 데이터 전송 (앞→뒤, 뒤→앞)
@State
- 뷰 계층 구조(view hierarchy)에서 데이터를 저장할 수 있도록 상태(state)를 지정할 때 사용합니다.
- 변수 앞에
@State를 붙입니다.
UIKit 을 사용했을 때는 어떠한 변수에 변화가 생기면 해당 변화를 직접 관찰하고 반영 해 주어야 했는데 SwiftUI 에서는 property wrapper 를 활용해 이러한 작업을 자동화 할 수 있도록 했다.
- 변화가 생기면 해당 변수의 값을 읽거나 새로 쓸 수 있음을 의미하는 property wrapper
- SwiftUI 는 state 로 선언된 property 들의 저장소를 관리
- State value 값이 변경되면 뷰는 해당 value 의 appearance 를 무효화 하고 다시 body 값을 계산
- state 변수값이 변경되면 view 를 다시 랜더링 하기 때문에 항상 최신 값을 가짐
- State 인스턴스는 그 자체로 값이 아닌, 값을 읽고 쓰는 것을 의미함
- 현재 뷰 UI의 특정 상태를 저장하기 귀해 만들어진 것이기 때문에 보통
private@State속성으로 어떤 프로퍼티의 초기값을 지정했다면, 다른 값으로 재할당 불가,@Binding변수를 통해서만 가능
@State의 예제
바인딩을 사용하여
View와 해당@State변수가 속한 모델 간의 양방향 연결을 만듭니다.예를 들어,Toggle과@State Bool속성 간에 바인딩을 만들 수 있습니다.토글 컨트롤과 상호 작용하면Bool값이 변경되고Bool값을 변경하면 토글이 표시된 상태를 업데이트합니다.
1
2
3
4
5
6
7
8
9
struct PlayButton: View {
    @State private var isPlaying: Bool = false // Create the state.

    var body: some View {
        Button(isPlaying ? "Pause" : "Play") { // Read the state.
            isPlaying.toggle() // Write the state.
        }
    }
}

@State 변수명 앞에 붙이는 달러($) 표시의 의미
$는 속성 래퍼 (property wrappers; 이전에는 “property delegates”라고 했음)와 함께 사용됩니다.연산자가 아니라 접두사(prefix)입니다.
예를 들어
@State var aState = false에서 State는 속성 래퍼입니다.즉, 다음과 같이 작성하면 됩니다.
◉
aState- 우리가Bool값에 접근하고 있습니다. ◉$aState-Binding<Bool>값에 액세스하고 있습니다.
@Binding
@State로 선언된 속성을 다른 뷰에서 사용하려 한다면@Binding을 사용해 줄 수 있다. 사용시에는 앞에$를 사용해 Bining 변수임을 나타낸다.@State로 선언된 속성에 변경이 생기면@Binding변수에서 이를 인지하고 해당 값에 따른 뷰 변화를 바로 반영할 수 있도록 하는 방식이다.- 다른 뷰에서
@State속성으로 선언된 프로퍼티를 사용한다면@Binding속성을 사용 - 사용시에는$를 앞에 붙여 binding 변수임을 나타냄 - 외부에서 접근해야 하기 때문에 private X
뷰 간 데이터 전달 (앞→뒤, 뒤→앞)
뷰를 띄우는 방법
sheet- 새로운 뷰가 화면 전체를 덮지 않고 카드처럼 겹쳐있는 형태
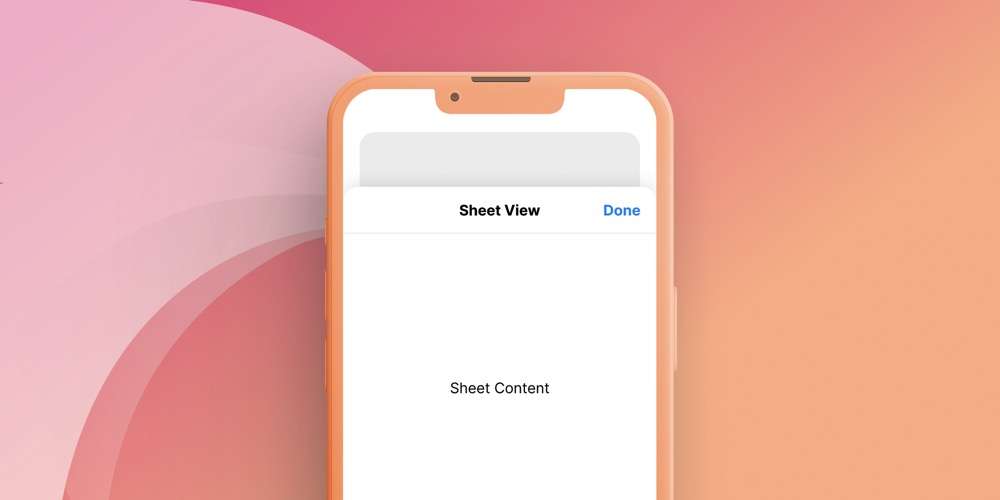
- 새로운 뷰가 화면 전체를 덮지 않고 카드처럼 겹쳐있는 형태
fullScreen- 새로운 뷰가 화면 전체를 덮는 형태
1
2
3
4
5
6
7
8
9
10
11
12
13
14
15
16
17
18
19
20
21
22
23
24
25
26
27
struct ContentView: View {
    // ... //
    @State var showAnotherView: Bool = false

    var body: some View {
        ZStack {
            // 전체 배경색 변경
            Color.cyan.ignoresSafeArea()

            VStack {
                Button {
                    // 화면이 사라지면 $showAnotherView가 알아서 바인딩해준다고 추측됨
                    showAnotherView = true
                } label: {
                    Text("차원 이동")
                }
                .sheet(isPresented: $showAnotherView) {
                    새로운뷰()
                }
                // // 또는 풀 스크린
                // .fullScreenCover(isPresented: $showAnotherView) {
                //     새로운뷰(name: "홍길동")
                // }
            }.background(Color.white)
        }
    }
}
차원 이동 버튼을 누르면 sheet 형태로 새로운View가 나타납니다.
데이터 전달: 앞 → 뒤
View의 파라미터를 이용합니다.
기초 뷰의 이름은 ContentView, 새로 띄울 뷰의 이름은 AnotherView 입니다.
1
2
3
4
5
6
7
8
9
10
11
12
13
14
15
16
17
struct AnotherView: View {
    @State var name = ""
    // ... //

    // 사라지기 버튼
    @Environment(\.dismiss) var dismiss

    var body: some View {
        Text("Next Dimension: \(name)")

        Button {
            dismiss()
        } label: {
            Text("Dismiss")
        }
    }
}
1
2
3
4
5
6
7
8
9
10
11
12
13
14
15
16
17
18
19
20
21
22
23
24
25
26
27
28
29
30
31
struct ContentView: View {
    @State var name: String = ""
    @State var anotherName: String = ""
    @State var showAnotherView: Bool = false

    var body: some View {
        // MusicPlayerView()
        // 예제 1: Data transfer between Views
        ZStack {
            // 전체 배경색 변경
            Color.cyan.ignoresSafeArea()

            VStack {
                TextField("Enter your name", text: $name)
                Button {
                    showAnotherView = true
                } label: {
                    Text("차원 이동")
                }
                .sheet(isPresented: $showAnotherView) {
                    AnotherView(name: name)
                }
                // .fullScreenCover(isPresented: $showAnotherView) {
                //     AnotherView(...)
                // }

                // ... //
            }.background(Color.white)
        }
    }
}
AnotherView의 파라미터로name에 현재ContentView의 이름(name)을 지정하면 다음 뷰에서 데이터를 받아올 수 있습니다.

뒤 → 앞
@Binding을 이용합니다.
1
2
3
4
5
6
7
8
9
10
11
12
13
14
15
16
17
struct AnotherView: View {
    @State var name = ""
    @Binding var anotherName: String

    // 사라지기 버튼
    @Environment(\.dismiss) var dismiss

    var body: some View {
        Text("Next Dimension: \(name)")
        TextField("Enter your another name", text: $anotherName)
        Button {
            dismiss()
        } label: {
            Text("Dismiss")
        }
    }
}
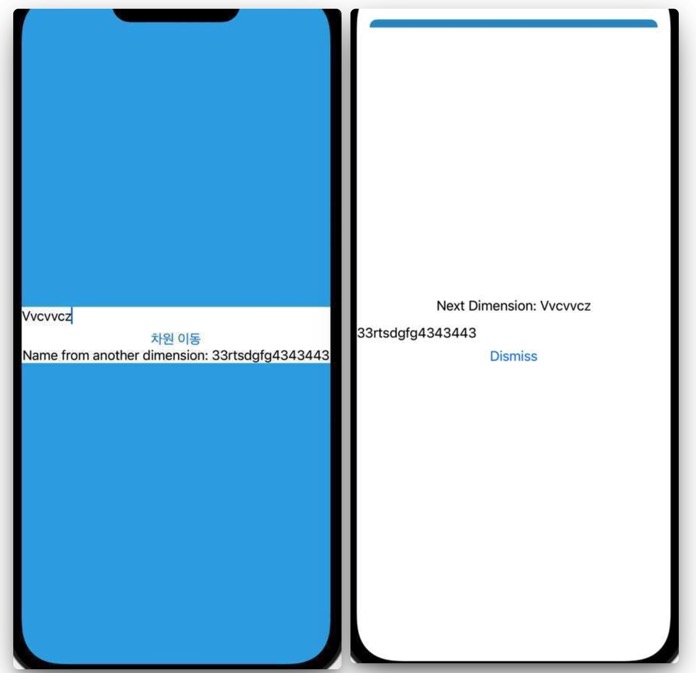
AnotherName을@Binding으로 지정하면 해당 변수를 참조하는 다른 뷰에 변경 사항을 반영시킬 수 있습니다.TextField값이 변경되면$anotherName(바인딩)이 변경되고 이것이 참조하는 뷰에 통보됩니다.
1
2
3
4
5
6
7
8
9
10
11
12
13
14
15
16
17
18
19
20
21
22
23
24
25
26
27
28
29
struct ContentView: View {
    @State var name: String = ""
    @State var anotherName: String = ""
    @State var showAnotherView: Bool = false

    @State private var isPlaying: Bool = false

    var body: some View {
        ZStack {
            // 전체 배경색 변경
            Color.cyan.ignoresSafeArea()

            VStack {
                TextField("Enter your name", text: $name)
                Button {
                    // 화면이 사라지면 $showAnotherView가 알아서 바인딩해준다고 추측됨
                    showAnotherView = true
                } label: {
                    Text("차원 이동")
                }
                .sheet(isPresented: $showAnotherView) {
                    AnotherView(name: name, anotherName: $anotherName)
                }

                Text("Name from another dimension: \(anotherName.isEmpty ? "아직 없음" : anotherName)")
            }.background(Color.white)
        }
    }
}
- AnotherView(…)
anotherName은AnotherView에서ContentView로 전송하기 위한 것입니다.anotherName은AnotherView에서@Binding으로 되어 있으므로AnotherView에서@Binding anotherName이 변경되면 바인딩되고, 그것이ContentView의@State anotherName에 영향을 미칩니다.
