Travis CI (Continuous Integration) + AWS Code Deploy로 깃허브(GitHub)에 올리면 자동 배포되게 하기
Travis CI (Continuous Integration)와 AWS Code Deploy를 이용하면 깃허브에 푸시만 해도 자동으로 웹 서비스가 빌드 및 배포되도록 할 수 있습니다.
하나의 EC2 계정에 여러 레퍼지토리를 빌드 및 배포할 수 있습니다. 아래 차례에서 6번 부분만 조심하면 됩니다.
자세한 내용은 위 출처에 나와 있으며, 이 게시물은 제가 나중에 다시 보기 위해 요약하였습니다.
travis-ci.org에서 깃허브 아이디로 회원가입 및 로그인내 프로필 아이콘 > Settings에서 깃허브 레퍼지토리 추가- AWS에서 Travis-CI가 접근할 수 있는 사용자를
IAM에서 생성 S3버킷 생성- IAM에서 EC2에 연동되는 코드 디플로이 역할(
Role) 생성 후 EC2에 연동 - 코드 디플로이 역할(Role) 생성,
CodeDeploy애플리케이션 및 배포 그룹 생성 - EC2 리눅스에 코드디플로이
에이전트설치 .travis.yml,appspec.yml파일 생성 후 깃허브에 푸시
방법
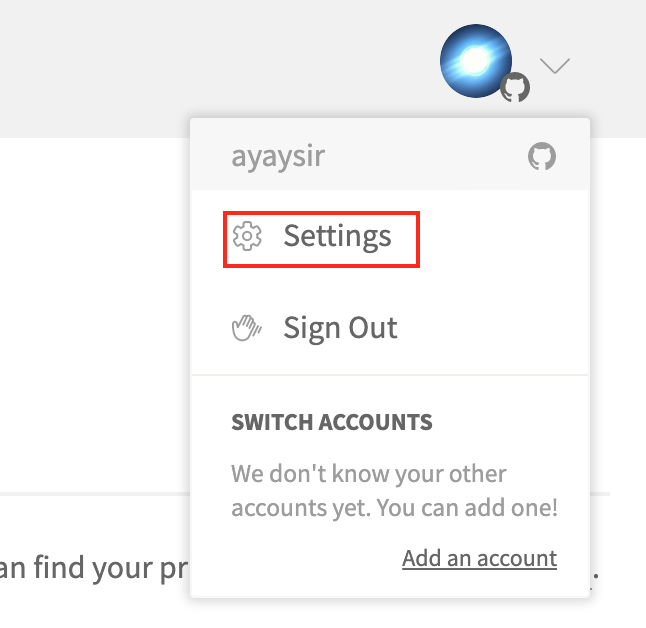
1. travis-ci.org 에서 깃허브 아이디로 회원가입 및 로그인
2. 내 프로필 아이콘 > Settings 에서 깃허브 레퍼지토리 추가
내 프로필 아이콘 > Settings 에서 깃허브 레퍼지토리 추가
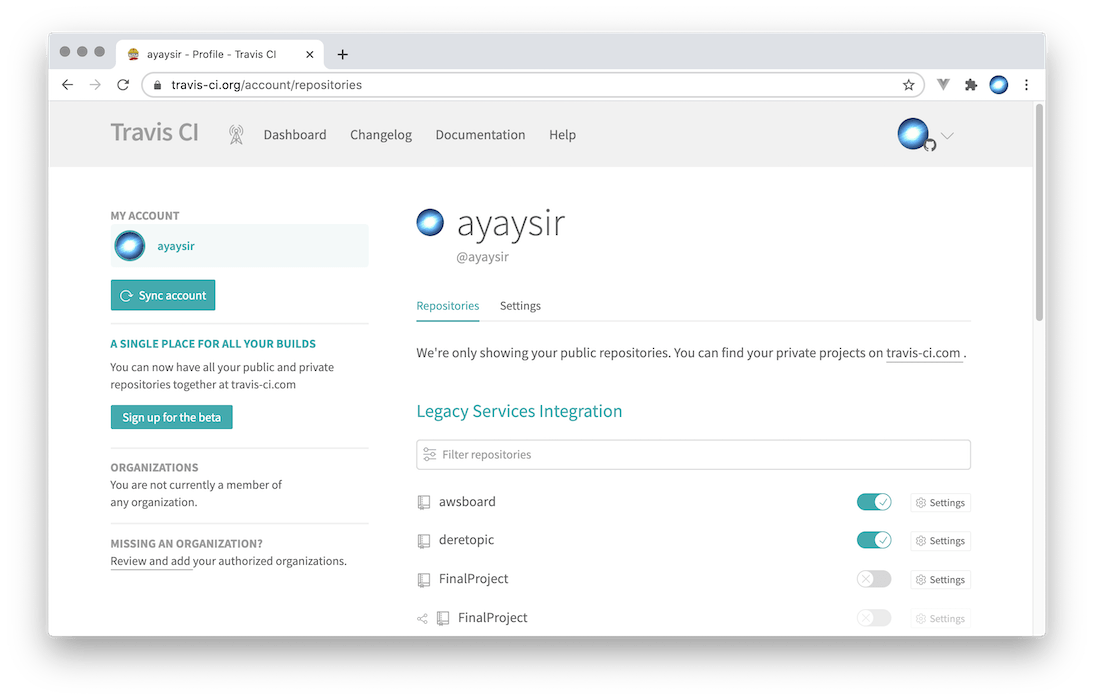
내 프로필 아이콘 > Settings 에서 깃허브 레퍼지토리 추가
3. AWS에서 Travis-CI가 접근할 수 있는 사용자를 IAM에서 생성
https://console.aws.amazon.com/에서 IAM 선택
![액세스 유형에서 `[프로그래밍 방식 액세스]` 선택](/assets/img/wp-content/uploads/2020/07/screenshot-2020-07-21-pm-10.37.07.png)
액세스 유형에서 [프로그래밍 방식 액세스] 선택
![권한 설정에서 `[기존 정책 직접 연결]`을 선택하고 `[AmazonS3FullAccess]` 및,](/assets/img/wp-content/uploads/2020/07/screenshot-2020-07-21-pm-10.38.06.png)
권한 설정에서 [기존 정책 직접 연결]을 선택하고 [AmazonS3FullAccess] 및,
![`[AWSCodeDeployFullAccess]`를 선택합니다.](/assets/img/wp-content/uploads/2020/07/screenshot-2020-07-21-pm-10.38.41-1.png)
[AWSCodeDeployFullAccess]를 선택합니다.
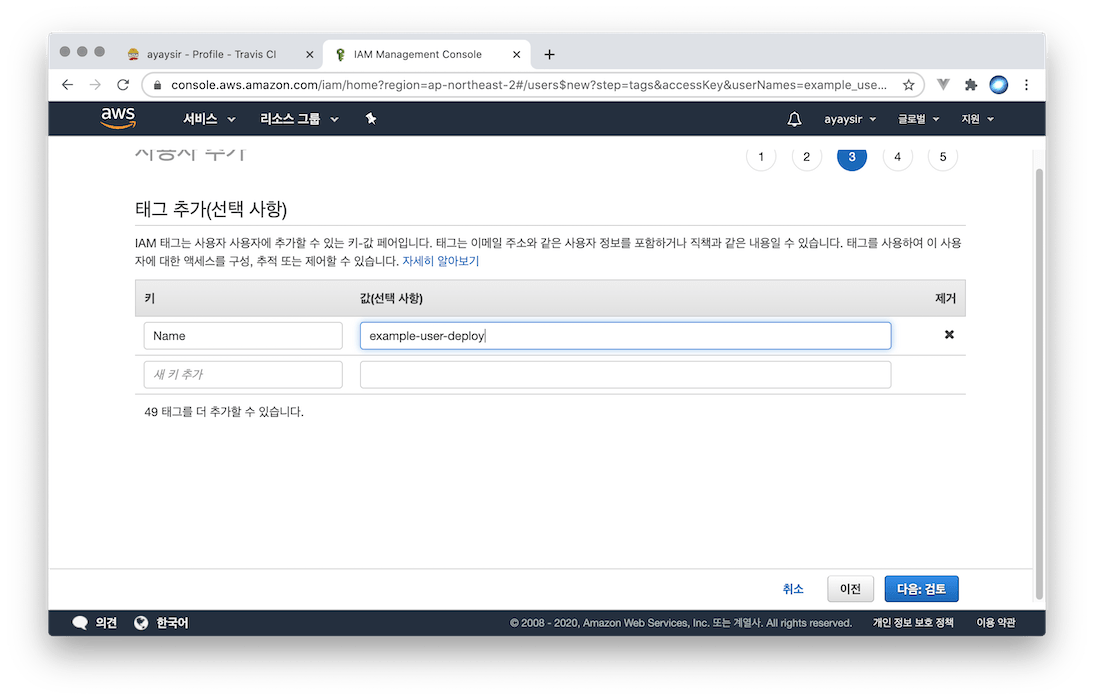
Name 태그 추가
![검토 후 `[사용자 만들기]` 버튼 클릭](/assets/img/wp-content/uploads/2020/07/screenshot-2020-07-21-pm-10.39.33.png)
검토 후 [사용자 만들기] 버튼 클릭
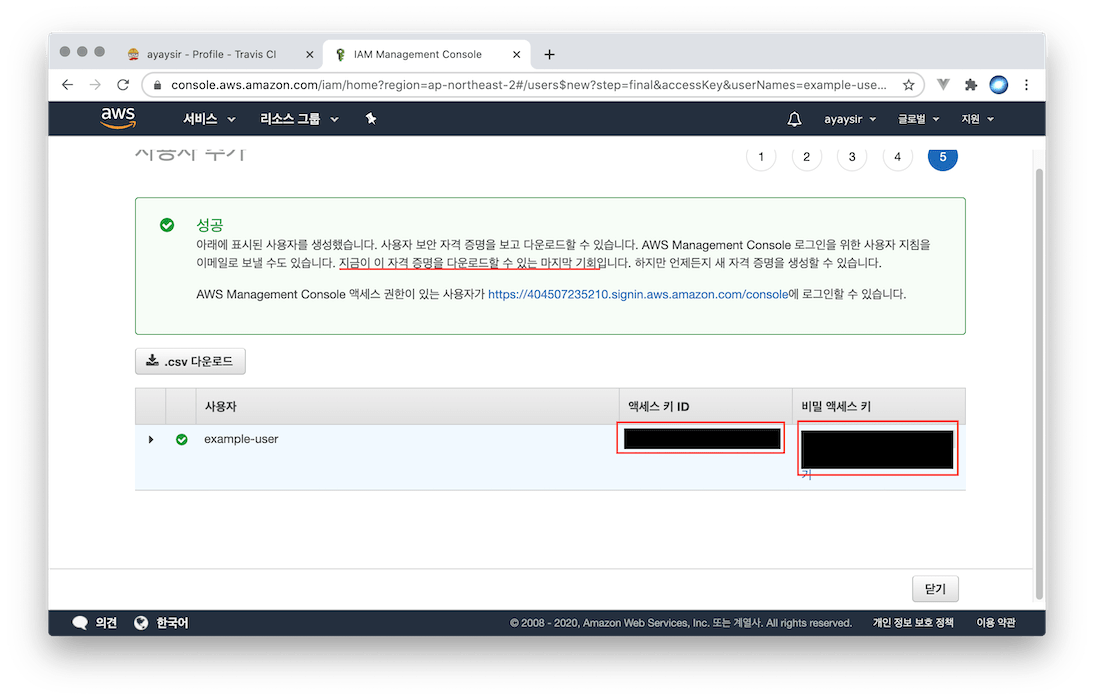
여기가 중요합니다. 액세스 키 ID, 비밀 액세스 키는 다시 찾기 어려우므로 여기서 미리 메모를 하거나 저장해야 합니다.
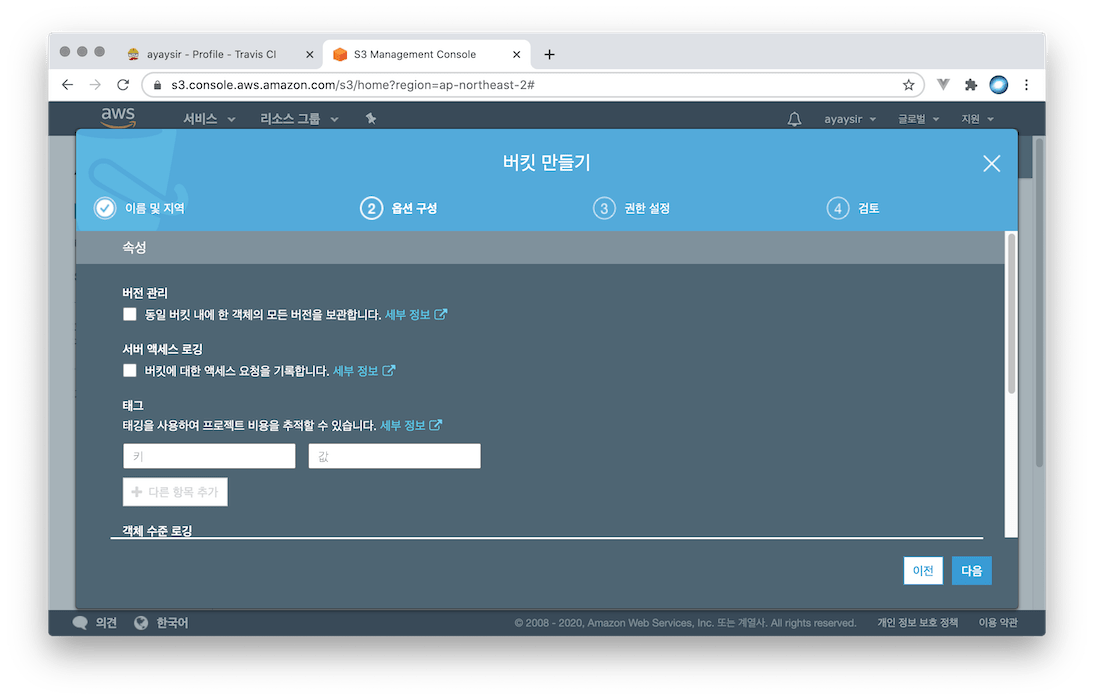
4. S3 버킷 생성
AWS S3은 파일을 저장할 수 있는 공간(버킷)을 제공하는 서비스입니다. 여기서 프로젝트 압축 zip을 Travis-CI와 AWS가 주고 받는 용도로 사용하기 위해 사용합니다.
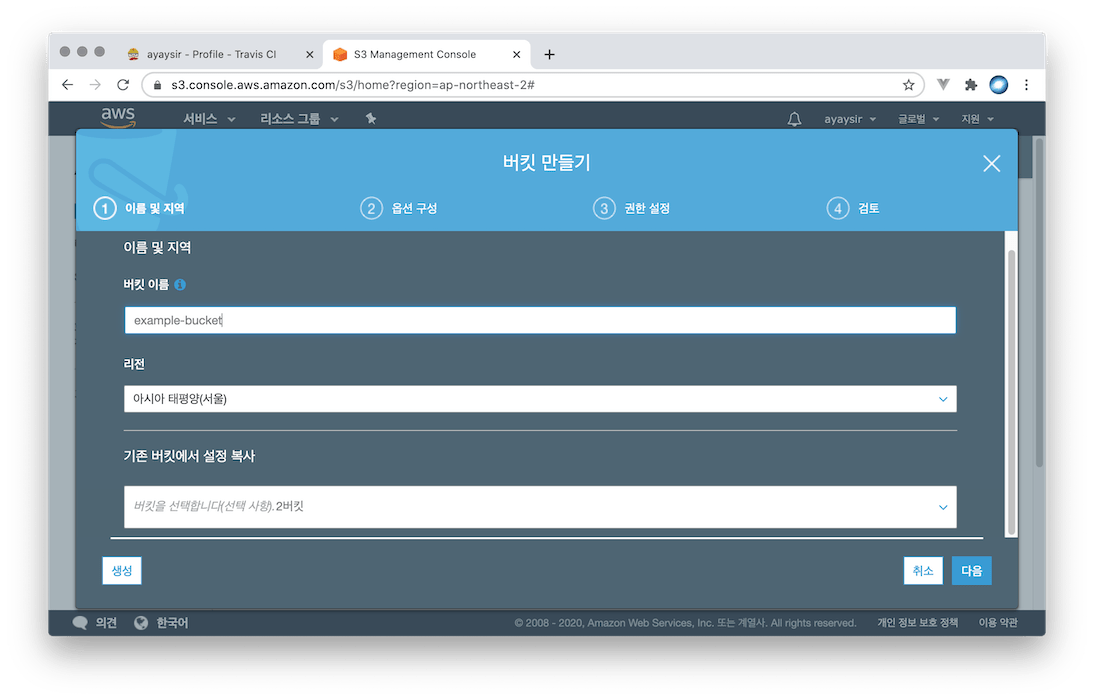
S3 서비스에 가서, 버킷 생성

버킷 이름 입력
[다음] 버튼 클릭

반드시 [모든 퍼블릭 액세스 차단]을 선택하고 버킷 생성
5. IAM에서 EC2에 연동되는 코드 디플로이 역할(Role) 생성 후 EC2에 연동
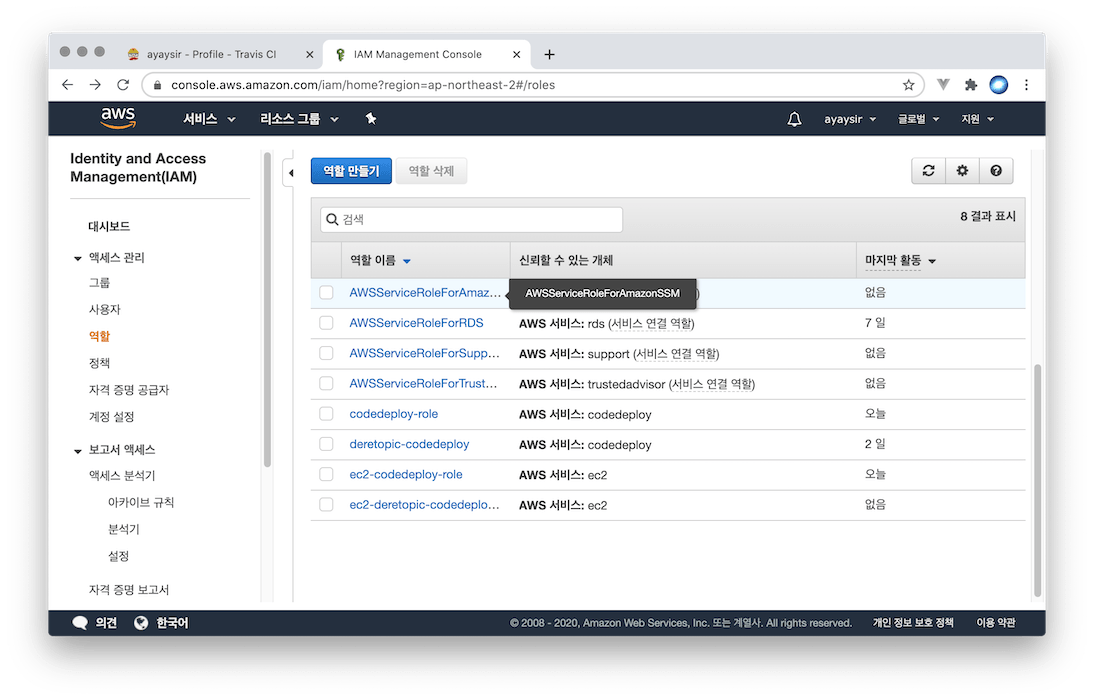
[역할 만들기] 선택

신뢰할 수 있는 유형의 개체 선택에서 [AWS 서비스]를 선택하고 사용 사례로 [EC2] 선택
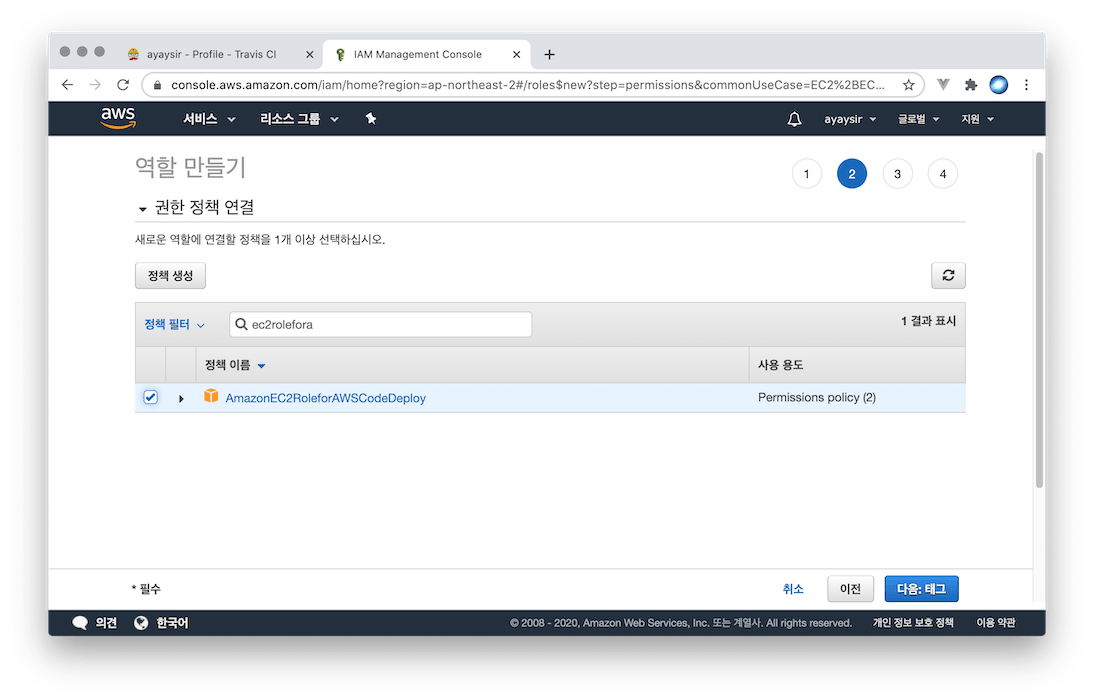
[AmazonEC2RoleforAWSCodeDeploy] 체크
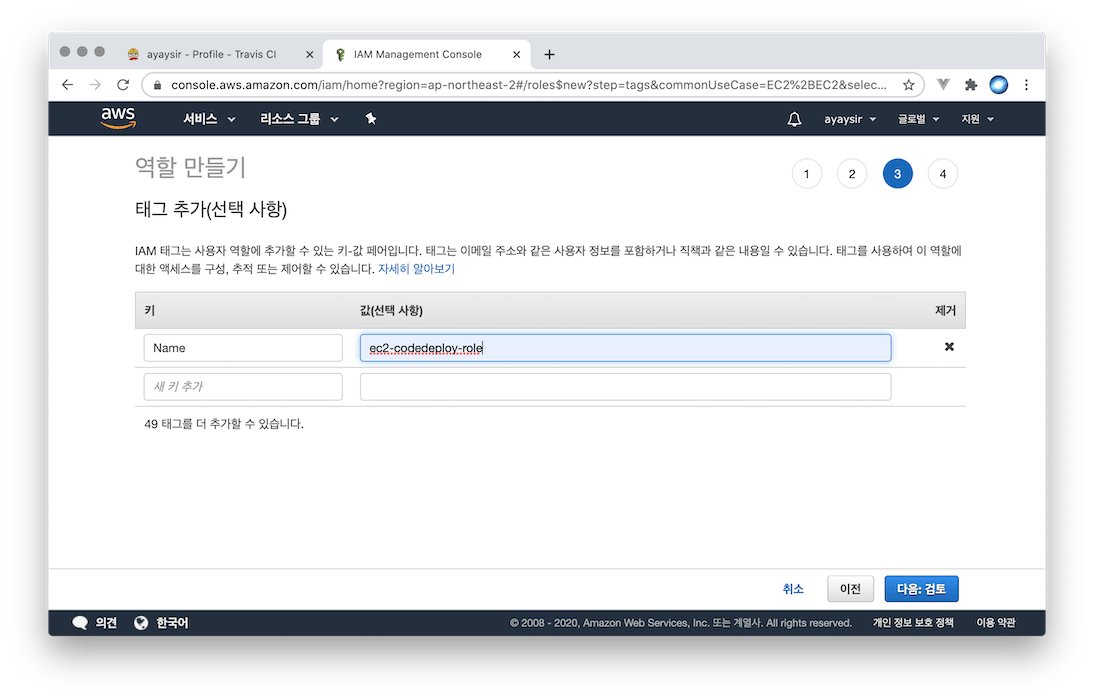
태그 추가
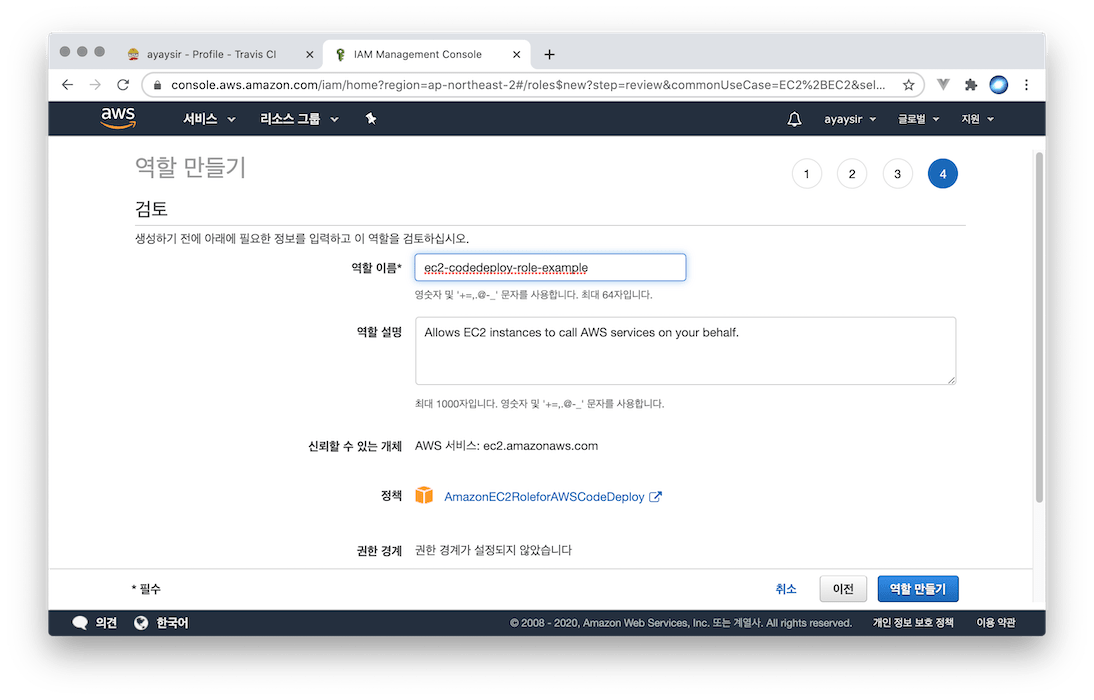
역할 이름을 입력합니다. 기존 역할 이름과 중복되면 안됩니다. [역할 만들기] 버튼을 클릭하면 역할이 만들어집니다.
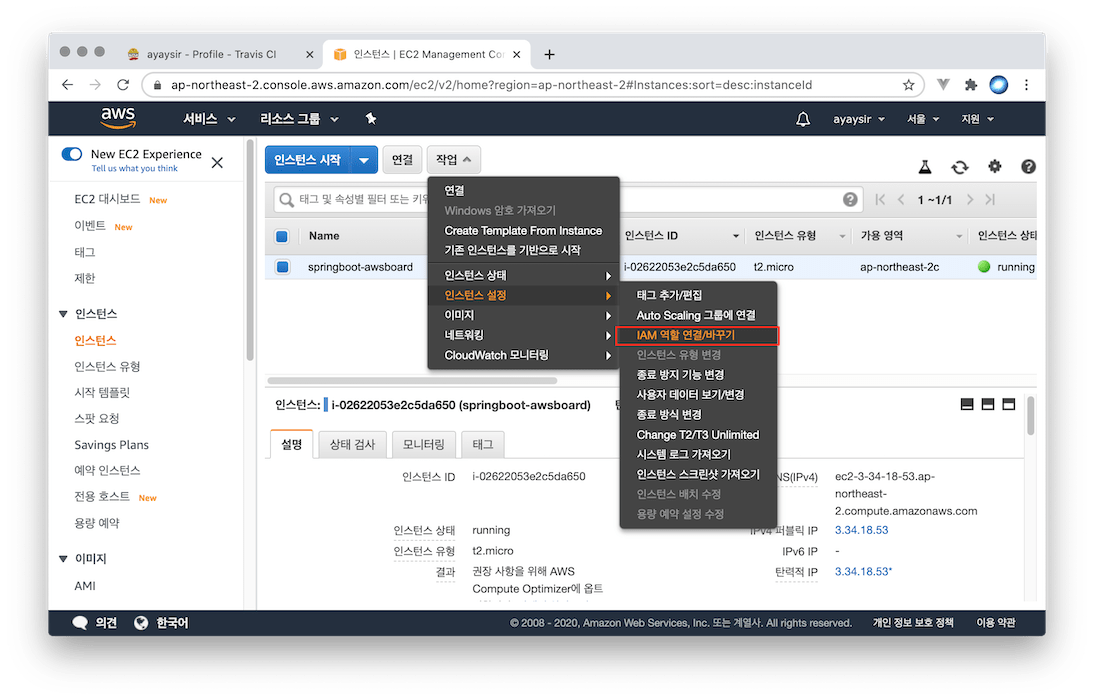
EC2 서비스 페이지로 가서 인스턴스 > 작업 > 인스턴스 실행 > [IAM 역할 연결바꾸기] 버튼을 클릭합니다.
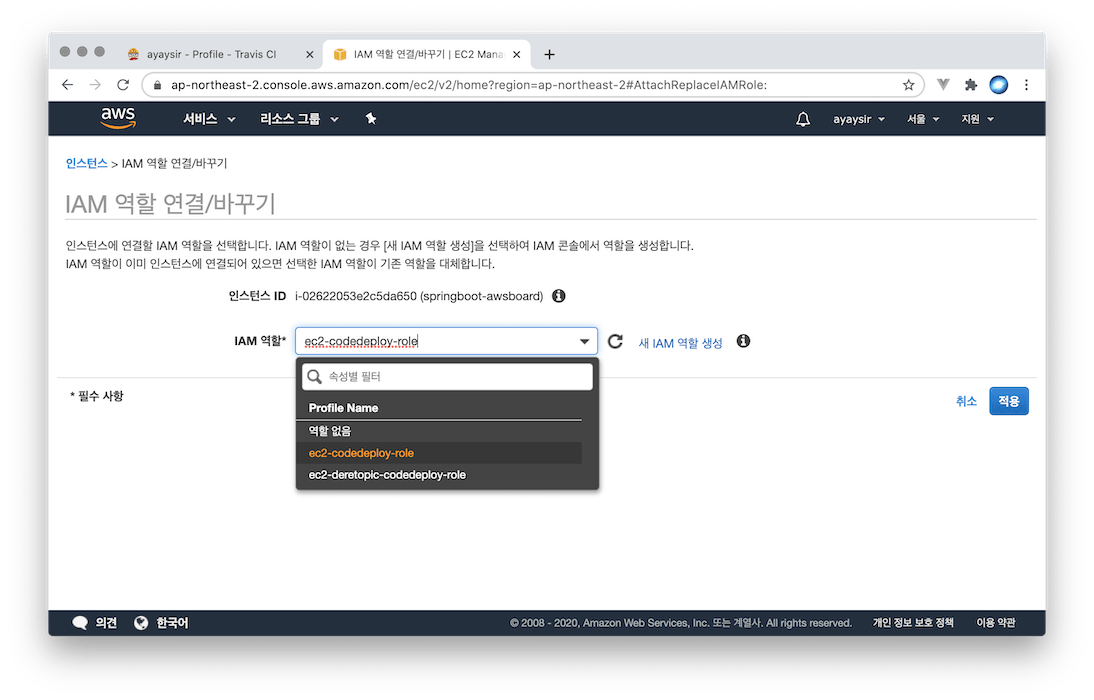
방금 만들었던 역할을 선택합니다. 선택할 수 있는 역할이 표시되고 이 중 하나를 선택하면 됩니다.
6. 코드 디플로이 역할(Role) 생성, CodeDeploy 애플리케이션 및 배포 그룹 생성
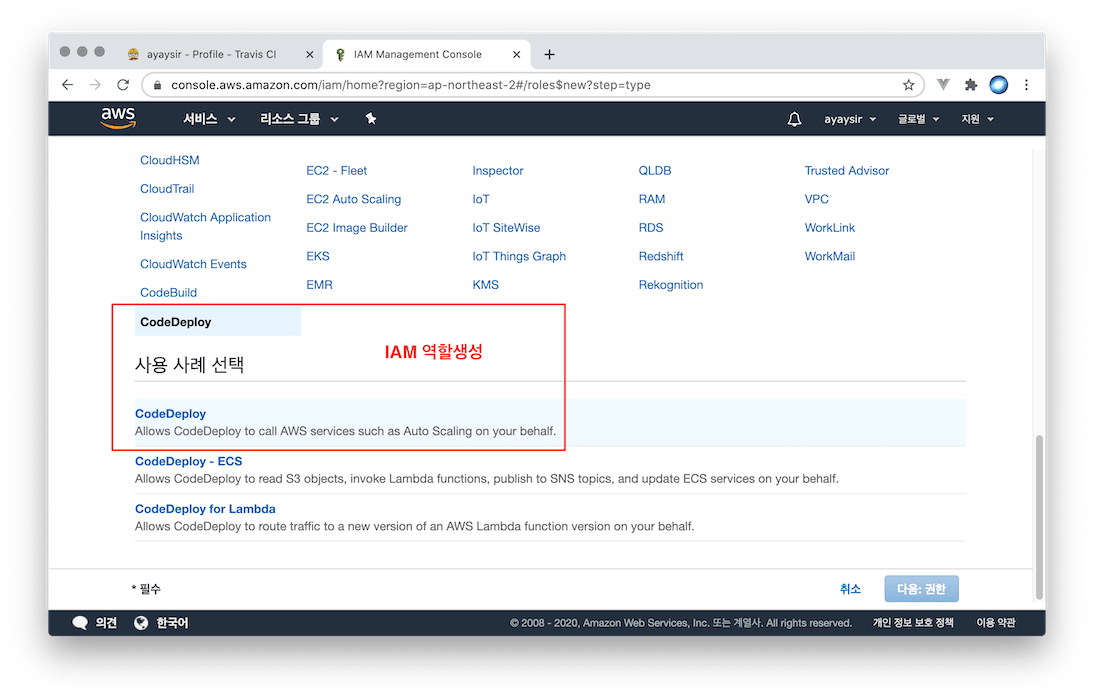
IAM 역할 생성하기를 다시 실행한 후 위 그림처럼 선택하고 다음으로 진행합니다.
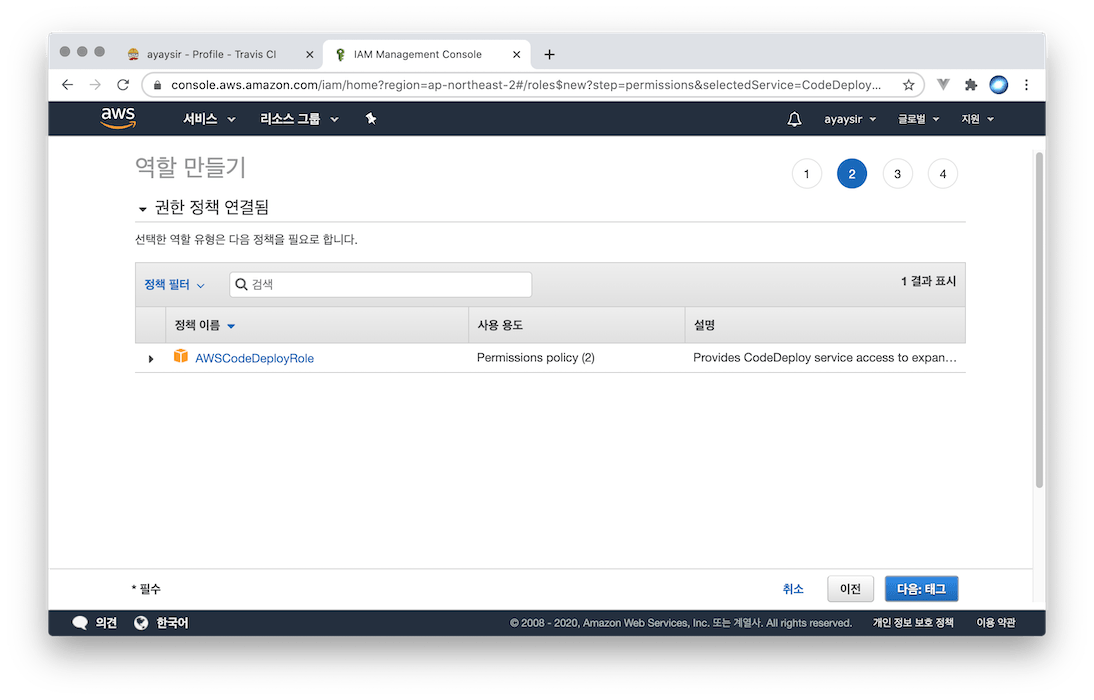
역할이 하나밖에 없어서 다음으로 넘어갑니다.
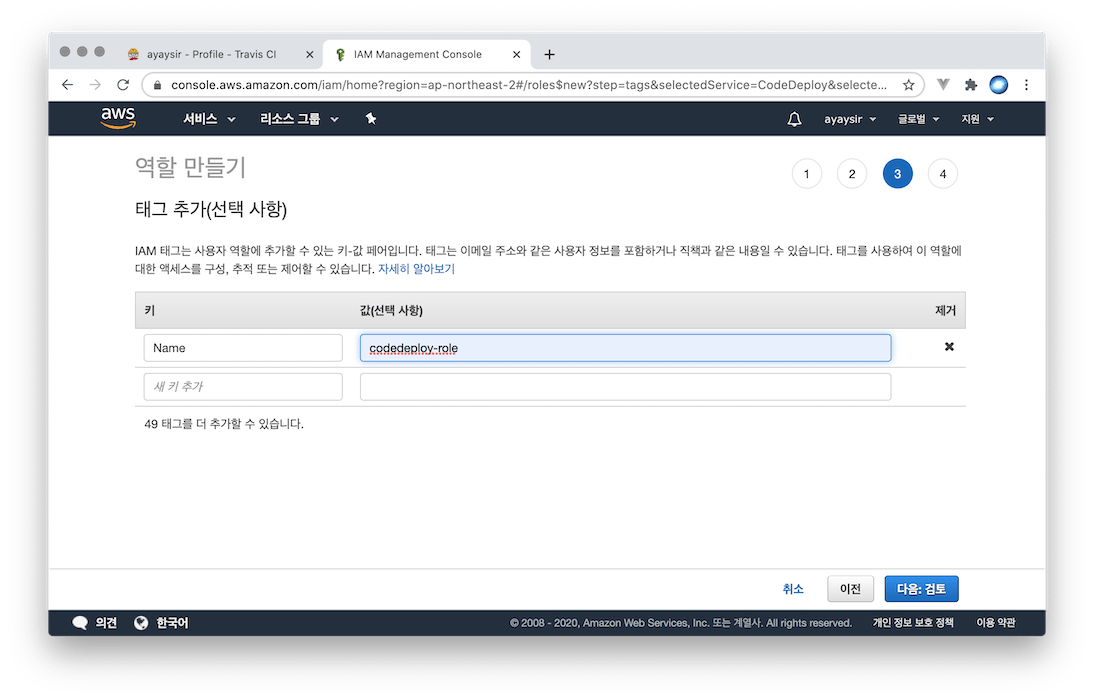
태그를 입력합니다.
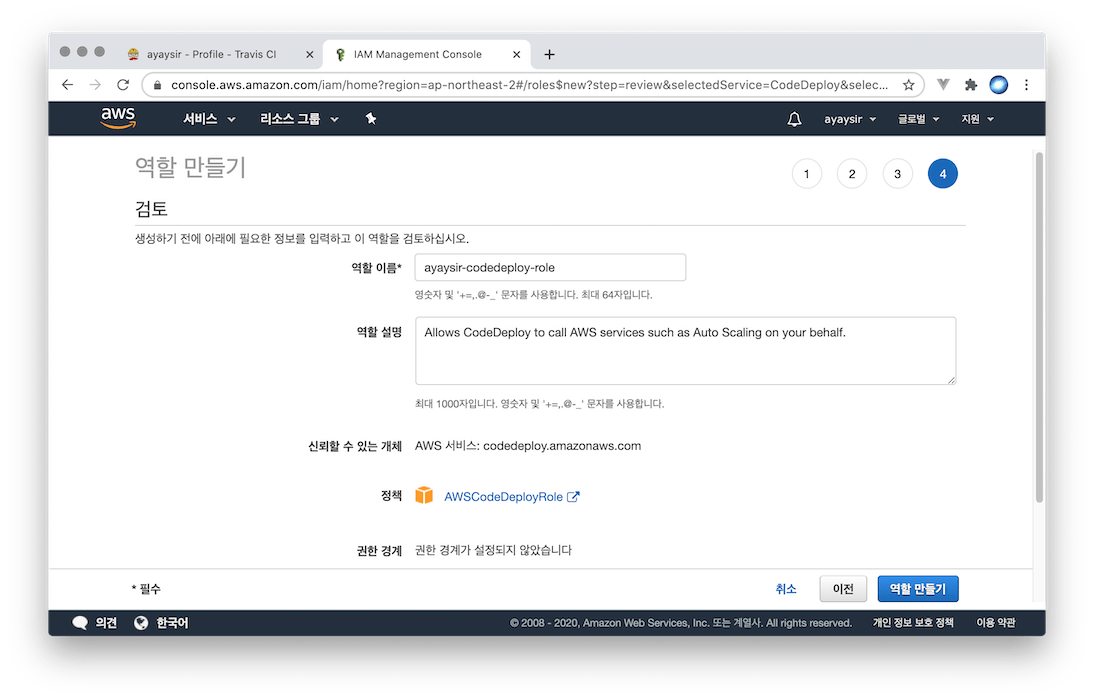
역할 이름을 입력하고 [역할 만들기] 버튼을 클릭하면 역할이 만들어집니다.
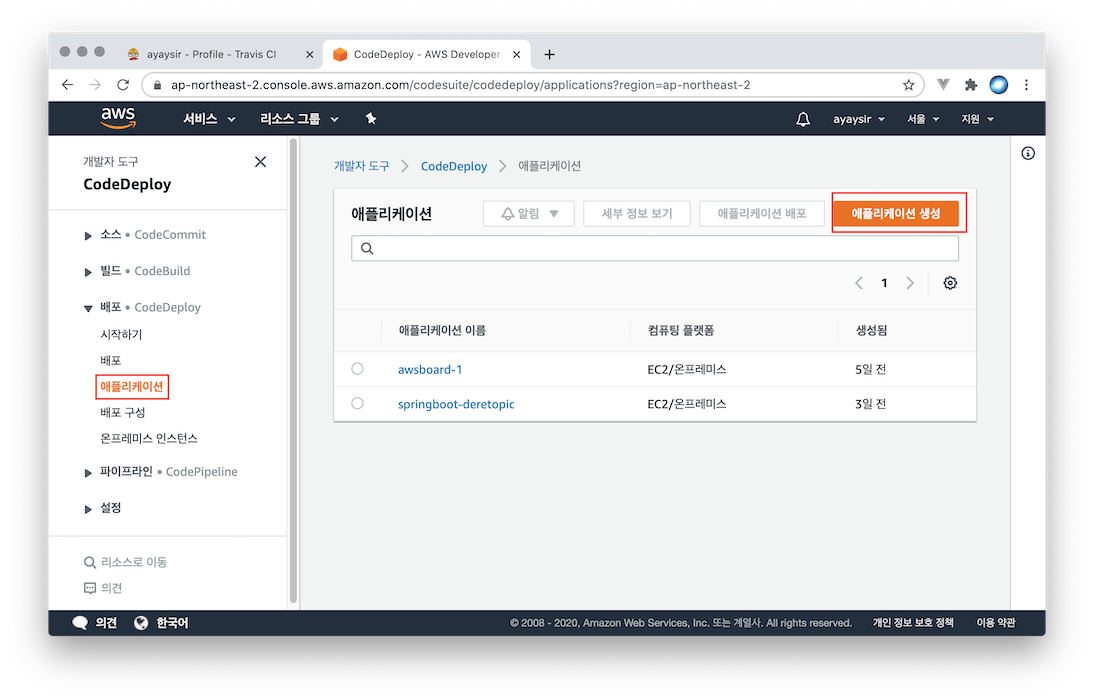
다음 CodeDeploy 페이지로 가서, [애플리케이션] 메뉴를 선택한 후 [애플리케이션 생성] 버튼을 클릭합니다.
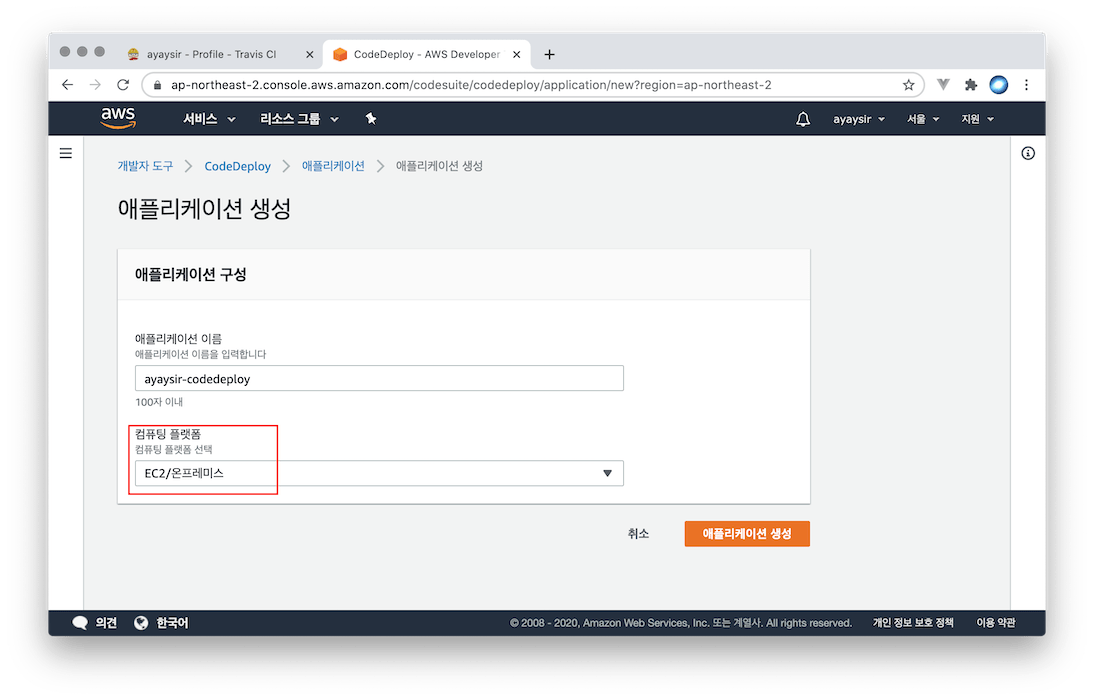
애플리케이션 이름을 입력하고, 컴퓨팅 플랫폼으로 [EC2/온프레미스]를 선택합니다.
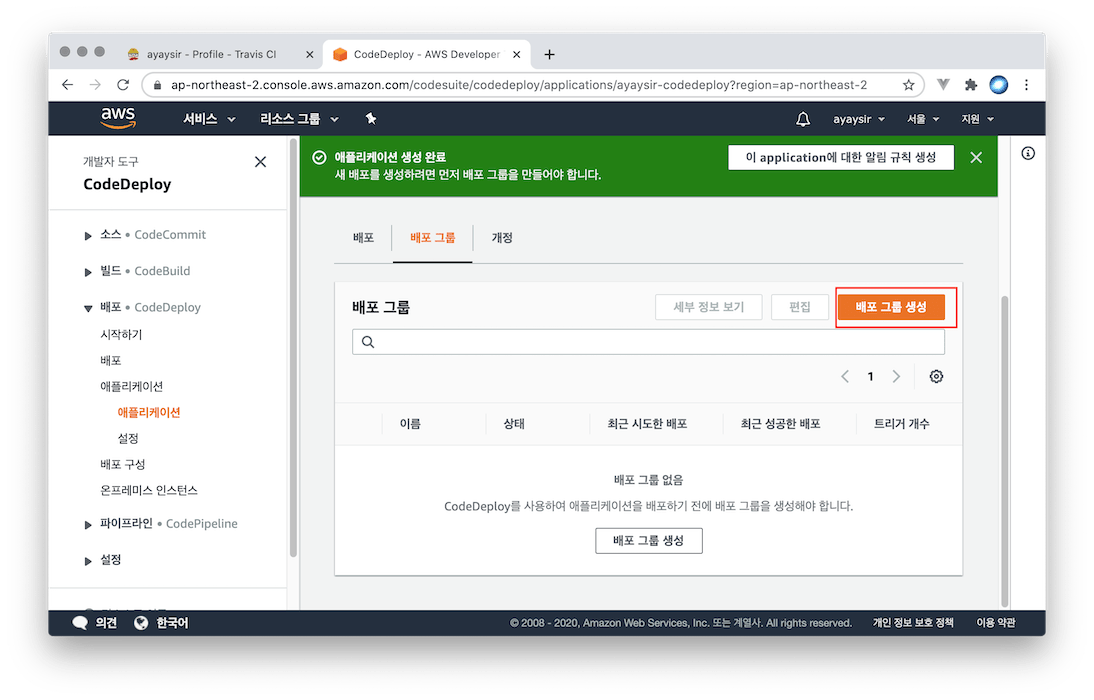
애플리케이션 생성이 완료되었으면 [배포 그룹 생성] 버튼을 클릭합니다.
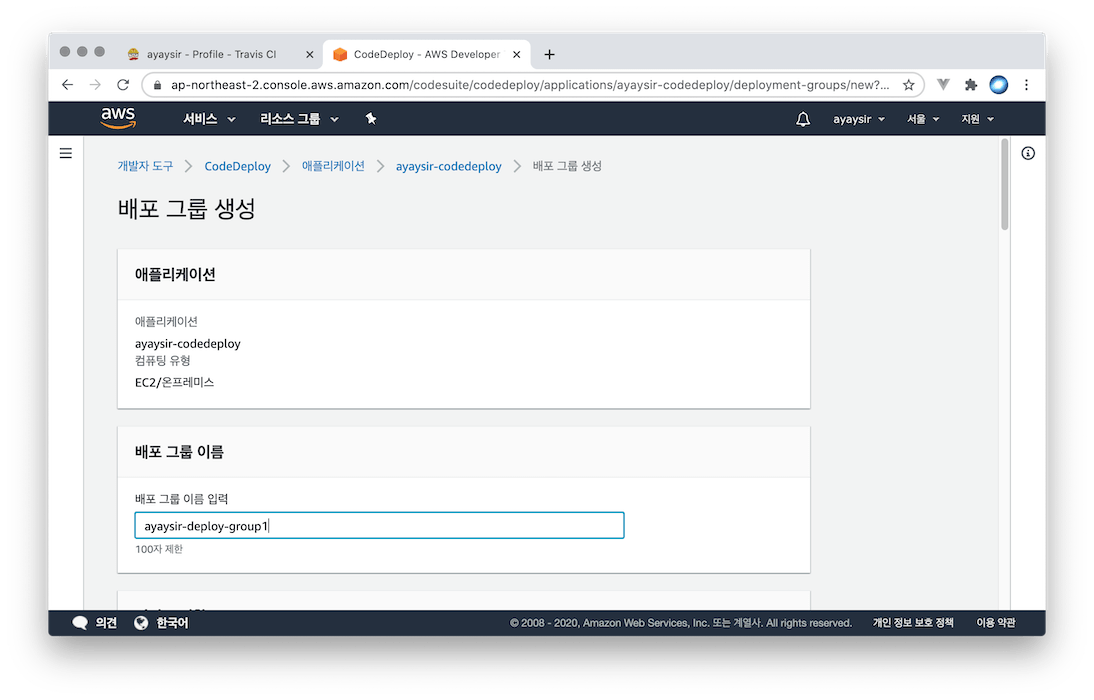
배포 그룹 이름 입력
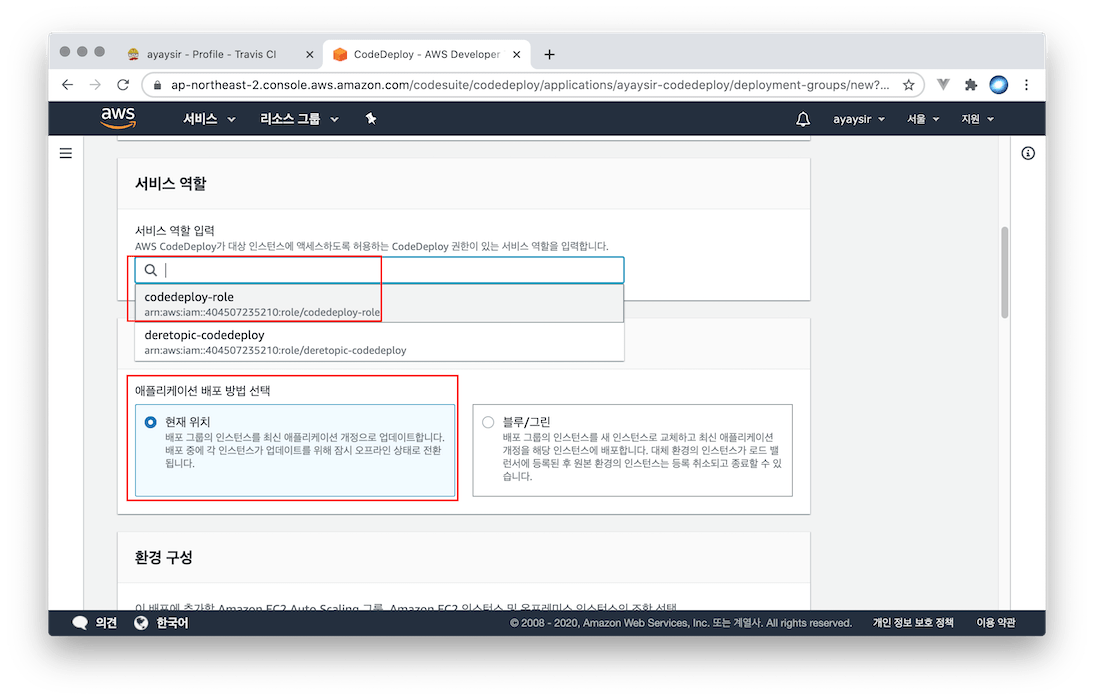
빨간색 부분대로 선택합니다.
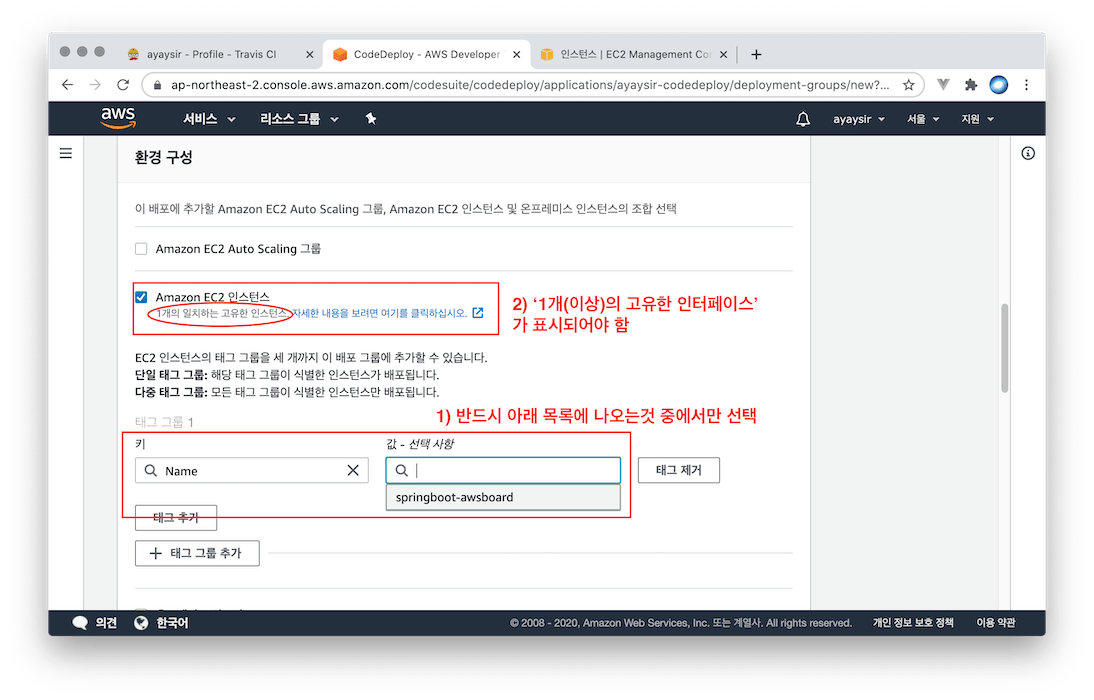
이 부분이 중요합니다. 여기서 환경 구성을 [Amazon EC2 인스턴스]를 선택한 후, 태그 그룹 부분을 위와 같이 입력합니다. 키를 Name으로 지정한 다음, 클릭하면 목록이 나오는데 현재 서비스중인 EC2 목록이 나옵니다. 이 목록 중에서 실제 빌드 및 배포가 진행될 EC2 인스턴스를 선택합니다.
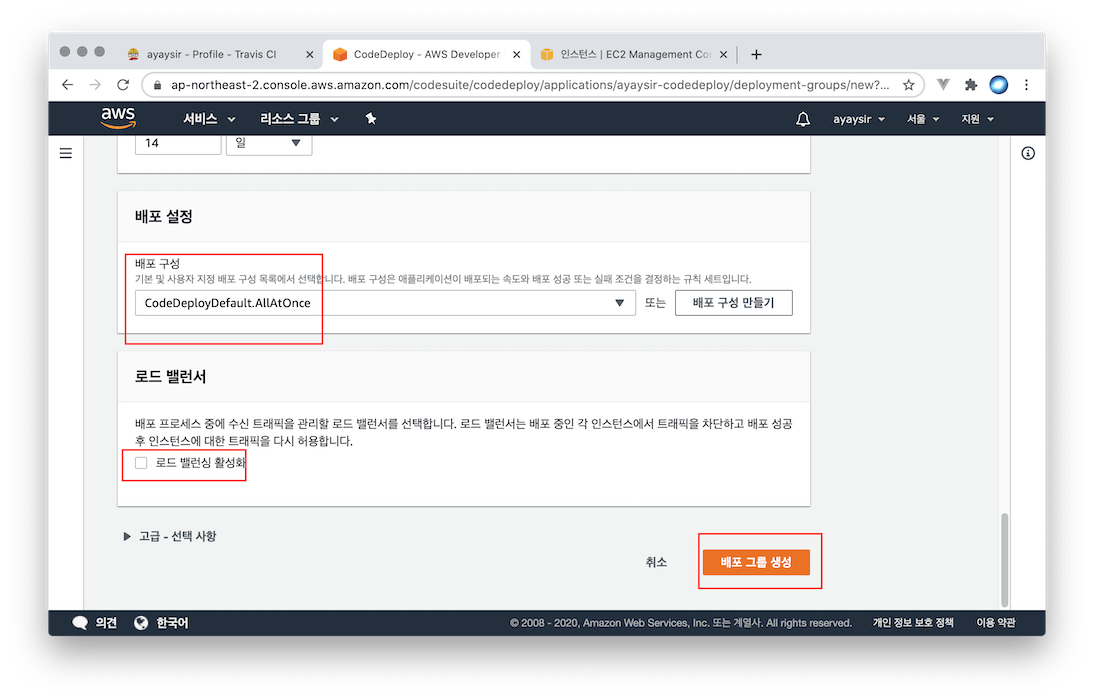
빨간색처럼 설정 후 [배포 그룹 생성] 버튼을 클릭하면 배포 그룹이 생성됩니다.
7. EC2 리눅스에 코드디플로이 에이전트 설치
EC2 터미널에 접속한 다음 아래 명령어를 입력합니다.
1
aws s3 cp s3://aws-codedploy-ap-northeast-2/latest/install . --region ap-northeast-2
내려받기가 성공한 경우 아래 메시지가 콘솔에 출력됩니다.
1
download: s3://aws-codedploy-ap-northeast-2/latest/install to ./install
install 파일에 실행 권한을 부여합니다.
1
chmod +x ./install
install 파일로 설치를 진행합니다.
1
sudo service codedeploy-agent status
설치가 끝났으면 Agent가 정상적으로 실행되고 있는지 상태 검사를 합니다.
1
sudo service codedeploy-agent status
아래 메시지가 출력되었다면 정상입니다.
1
The AWS CodeDeploy agent is running as PID *******
8. .travis.yml, appspec.yml 파일 생성 후 깃허브에 푸시
.travis.yml 과 appspec.yml 파일을 Git 레퍼지토리의 루트 디렉토리에 넣고 다음과 같이 입력합니다.
그 전에 .travis.yml에 사용할 변수를 설정합니다.
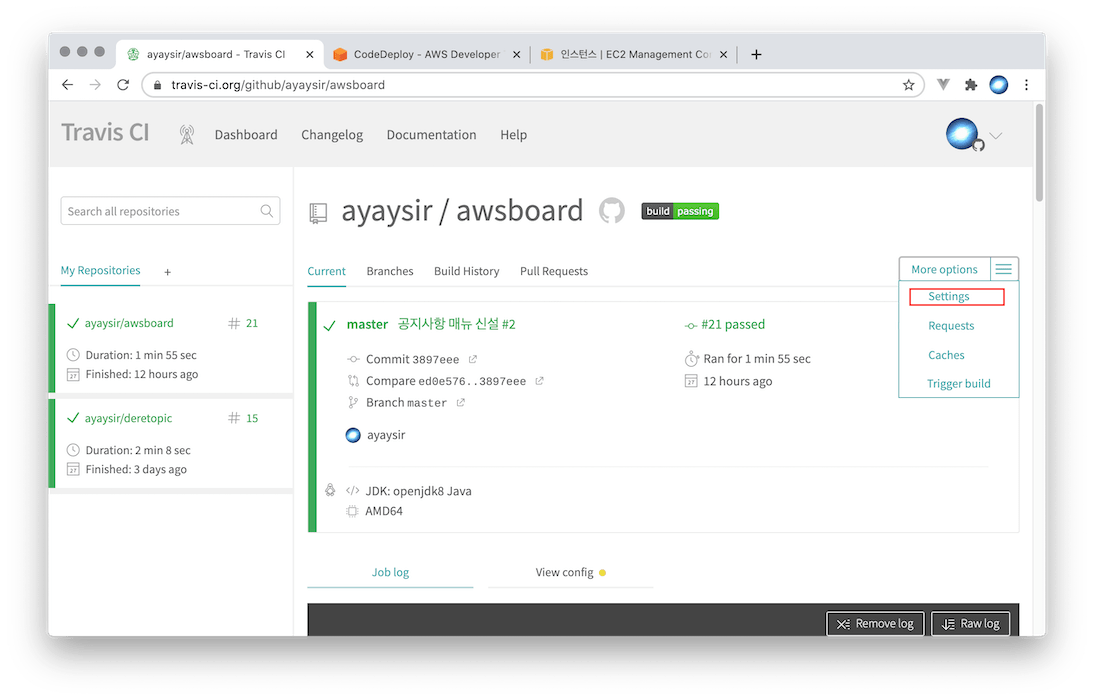
레퍼지토리 페이지에서 오른쪽 상단의 More options > Settings를 클릭합니다.
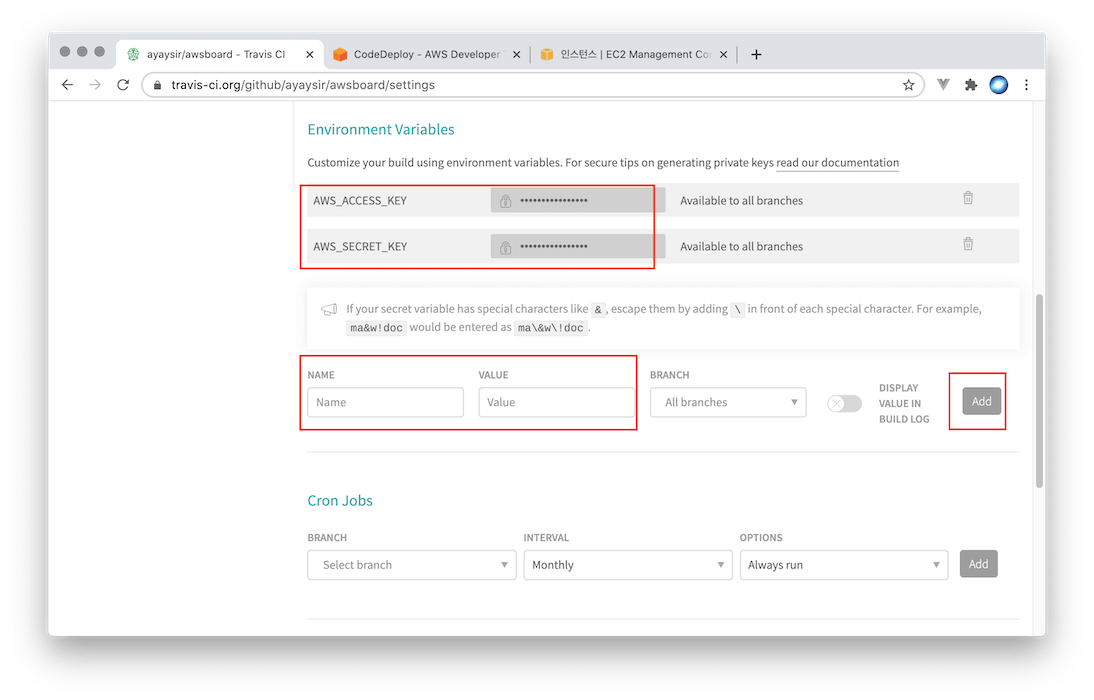
변수명으로 사용할 이름을 입력하고 위에서 발급받은 액세스 키, 비밀 키를 입력합니다. 이 변수들은 .travis.yml에서 $[변수명]으로 사용할 수 있습니다.
1
2
3
4
5
6
7
8
9
10
11
12
13
14
15
16
17
18
19
20
21
22
23
24
25
26
27
28
29
30
31
32
33
34
35
36
37
38
39
40
41
42
43
44
45
46
47
48
49
50
51
52
53
language: java
jdk:
  - openjdk8

branches:
  only:
    - master

# Travis CI 서버의 Home
cache:
  directories:
    - '$HOME/.m2/repository'
    - '$HOME/.gradle'

script: "./gradlew clean build"

# CI 실행 완료 시 메일 전송
notifications:
  email:
    recipients:
      - [안내받을_이메일_주소]

before_deploy:
  - mkdir -p before-deploy
  - cp scripts/*.sh before-deploy/
  - cp appspec.yml before-deploy/
  - cp build/libs/*.jar before-deploy/
  - cd before-deploy && zip -r before-deploy * # before-deploy로 이동 후 전체 압축
  - cd ../ && mkdir -p deploy
  - mv before-deploy/before-deploy.zip deploy/[프로젝트_이름].zip

deploy:
  - provider: s3
    access_key_id: $AWS_ACCESS_KEY
    secret_access_key: $AWS_SECRET_KEY
    bucket: [s3의_버킷_이름]
    region: ap-northeast-2
    skip_cleanup: true
    acl: private
    local_dir: deploy
    wait-until-deployed: true

  - provider: codedeploy
    access_key_id: $AWS_ACCESS_KEY
    secret_access_key: $AWS_SECRET_KEY
    bucket: [s3의_버킷_이름]
    key: [프로젝트_이름].zip
    bundle_type: zip
    application: [코드디플로이_애플리케이션_이름] # 웹 콘솔에서 등록한 코드디플로이 애플리케이션
    deployment_group: [바로위_코드디플로이_애플리케이션의_배포그룹_이름]
    region: ap-northeast-2
    wait-until-deployed: true
[_한글_] 로 되어있는 부분들을 커스터마이징 하면 됩니다.
트래비스 빌드가 안되는 이유는 첫째, 확장자가 yml이어야 합니다. (yaml인 경우 동작이 안됐습니다) 둘째, 문법에 맞지 않으면 설정 파일을 인식하지 못하고 빌드가 되지 않습니다. 불편한 점은 설정 파일의 어디가 잘못되었는지 알려주지 않기 때문에 직접 찾아야 한다는 점입니다.
1
2
3
4
5
6
7
8
9
10
11
12
13
14
15
16
17
18
version: 0.0
os: linux
files:
  - source: /
    destination: /home/ec2-user/[애플리케이션_파일들이_위치할_경로]
    overwrite: yes

permissions:
  - object: /
    pattern: "**"
    owner: ec2-user
    group: ec2-user

hooks:
  ApplicationStart:
    - location: deploy.sh # scripts/deploy.sh
      timeout: 60
      runas: ec2-user
마지막으로 /scripts/deploy.sh 에 빌드 및 배포 작업을 실행할 스크립트 파일을 작성합니다. 이 부분은 프로젝트 성격에 따라 차이가 있을 수 있습니다.
1
2
3
4
5
6
7
8
9
10
11
12
13
14
15
16
17
18
19
20
21
22
23
24
25
26
27
28
29
30
31
32
33
34
#!/bin/bash

REPOSITORY=/home/ec2-user/[애플리케이션_파일들이_위치할_경로]
PROJECT_NAME=[프로젝트_이름]

echo "> 빌드 파일 복사"
cp $REPOSITORY/zip/*.jar $REPOSITORY/

echo "> 현재 구동중인 애플리케이션 pid 확인"
CURRENT_PID=$(pgrep -fl ${PROJECT_NAME} | grep jar | awk '{print $1}')

echo "> 현재 구동중인 애플리케이션 pid: $CURRENT_PID"

if [ -z "$CURRENT_PID" ]; then
        echo "> 현재 구동중인 애플리케이션이 없으므로 종료하지 않습니다."
else
    	echo "> kill -9 $CURRENT_PID"
        kill -9 $CURRENT_PID
        sleep 5
fi

echo "> 새 애플리케이션 배포"
JAR_NAME=$(ls -tr $REPOSITORY/ | grep jar | tail -n 1)

echo "> JAR Name: $JAR_NAME"

echo "> $JAR_NAME 에 실행권한 추가"
chmod +x $REPOSITORY/$JAR_NAME

echo "> $JAR_NAME 실행"
nohup java -jar \
        -Dspring.config.location=classpath:/application-real.properties \
        -Dspring.profiles.active=real \
        $REPOSITORY/$JAR_NAME > $REPOSITORY/nohup.out 2>&1 &
다음 깃허브에 푸시하면 성공 또는 실패 화면이 뜨게 됩니다. 위의 경우 빌드 및 배포가 성공한 화면이며, 실패 시 빨간색 화면으로 Error가 뜹니다.